A single cup of pour over coffee, brewed slowly through a glass dripper, can taste so different from your usual drip machine that you’d think the beans were swapped. They weren’t. The glass just lets you see, control, and appreciate every step — and that changes everything about the flavor in your mug.
If you’re here, you probably already know that pour over coffee is a thing. Maybe you’ve seen those elegant glass setups on Instagram or at your favorite café. Maybe you tried one at a friend’s place and couldn’t stop thinking about it. Or maybe you’re just tired of your automatic drip machine giving you lukewarm, bland coffee and you want something better without spending a fortune.
Whatever brought you here, you’re in the right place. This article breaks down everything you actually need to know about glass pour over coffee makers — what makes them different, how to choose one, how to brew with one, and whether they’re really worth it for someone like you. No fluff, no hype, just honest talk from someone who’s been making pour over coffee for years and has broken more than one carafe along the way.
What Exactly Is a Glass Pour Over Coffee Maker?
Let’s keep this simple. A glass pour over coffee maker is a manual brewing device — usually made from borosilicate glass — where you place a filter on top, add ground coffee, and slowly pour hot water over it. The brewed coffee drips through the filter and collects in the glass vessel below.
That’s it. No electricity, no buttons, no timers built in. Just you, hot water, coffee grounds, and gravity.
The “glass” part matters more than you might think. Unlike plastic or ceramic pour over devices, glass doesn’t absorb flavors or odors over time. It doesn’t react with the acids in your coffee. And it lets you watch the brewing process happen in real time — you can literally see the coffee dripping, the bloom expanding, and the color developing. That visual feedback actually helps you get better at brewing.
Quick fact: Borosilicate glass, the same material used in lab equipment, can handle sudden temperature changes without cracking. That’s why most quality glass pour over makers use it instead of regular soda-lime glass.
The most recognized glass pour over coffee maker is probably the Chemex, invented by Peter Schlumbohm in 1941. It’s been in production for over 80 years and sits in the permanent collection of the Museum of Modern Art in New York. But there are plenty of other excellent options now — from Hario’s V60 glass series to smaller artisan brands making beautiful handblown pieces.
If you’ve been debating between a French press and a pour over setup, understanding how glass pour over works will help you make a much more confident decision.
Why Choose Glass Over Other Materials?
Pour over coffee makers come in several materials — ceramic, stainless steel, plastic, copper, and glass. Each has its fans. But glass holds a special place, and here’s why.
Flavor Purity
Glass is chemically inert. It doesn’t leach anything into your coffee, doesn’t hold onto oils from previous brews, and doesn’t add any taste of its own. With a metal pour over coffee maker, some people notice a very faint metallic note — especially with lighter roasts. Plastic can sometimes carry a slight taste, particularly when new. Glass? Nothing. Just clean, honest coffee flavor.
This is the same reason wine experts prefer glass over metal or plastic. The material stays out of the way and lets the drink speak for itself.
Heat Visibility and Control
Here’s something people don’t talk about enough: glass lets you see what’s happening inside. You can watch the water level, see how fast coffee is dripping, and notice if your extraction is running too slow (which means your grind is probably too fine). That kind of visual feedback is genuinely helpful, especially if you’re still learning the pour over technique.
With an opaque ceramic or metal brewer, you’re essentially guessing. With glass, you’re observing.
Aesthetic Appeal
Let’s be honest — a glass pour over coffee maker looks beautiful on a countertop. There’s a reason Chemex became a design icon. The transparency of glass, the warm amber color of coffee flowing through it, the simplicity of the shape — it all adds up to something that feels intentional and calming. Morning coffee becomes a small ritual instead of just another task.
The Downside Nobody Hides
Glass breaks. That’s the trade-off, plain and simple. Drop a glass carafe on a tile floor, and you’re sweeping up shards and ordering a replacement. Borosilicate glass is tougher than regular glass, but it’s still glass. If you have young kids running around or you’re looking for something to toss in a backpack for camping, a stainless steel or plastic option might be more practical.
Pro tip: Keep your glass pour over maker on a stable surface, away from counter edges. It sounds obvious, but most breaks happen from accidental nudges, not actual drops.
How a Glass Pour Over Coffee Maker Actually Works
The science behind pour over coffee is beautifully straightforward. You’re using gravity and controlled water flow to extract flavor compounds from ground coffee. But the details matter a lot, and understanding them will help you make noticeably better cups.
The Bloom
When you first pour a small amount of hot water over fresh coffee grounds, they puff up and release carbon dioxide gas. This is called the bloom. It’s a sign that your beans are fresh — stale coffee barely blooms at all. You want to let this happen for about 30 to 45 seconds before continuing to pour.
Why does this matter? Because CO2 creates a barrier between the water and the coffee. If you don’t let it escape first, water can’t properly extract the good stuff — the sugars, the acids, the aromatic compounds that make your coffee taste like something worth waking up for.
The Pour
After the bloom, you pour water slowly in a circular motion, starting from the center and spiraling outward. The goal is even saturation — you want every coffee ground to get the same amount of water contact. Uneven pouring means some grounds get over-extracted (bitter) while others get under-extracted (sour and weak).
A gooseneck kettle makes this dramatically easier. The narrow spout gives you precise control over flow rate and direction. Pouring from a regular kettle is like trying to paint details with a roller instead of a brush — it’ll technically work, but the results won’t be the same.
The Draw Down
Once all your water has been poured, gravity pulls the brewed coffee through the filter and into the glass carafe below. The total brew time — from first pour to last drip — should typically land between 3 and 4 minutes for a single cup. If it’s much faster, your grind is too coarse. If it’s much slower, your grind is too fine.
And here’s where glass really shines: you can watch the draw down happen. You’ll see the stream of coffee narrowing as the last water passes through, and you can gauge your timing just by looking.
Choosing the Right Glass Pour Over Coffee Maker
Not all glass pour over makers are created equal. The differences might seem subtle on a product page, but they show up clearly in your cup. Here’s what to pay attention to.
Size and Capacity
Think about how many cups you typically brew. Pour over is at its best when you’re making one to three cups. Larger batches — like 6 to 8 cups on a Chemex — work fine, but you’ll need more coffee, more water, and more patience.
If you mostly brew for yourself, a single cup pour over maker is the sweet spot. Less waste, faster brew, and easier to dial in your technique.
Filter Type
This is a bigger deal than most people realize. Glass pour over makers generally use one of two filter styles:
Paper filters trap oils and fine sediment, producing a very clean, bright cup. Chemex filters are famously thick — about 20 to 30 percent heavier than standard paper filters — which is why Chemex coffee tastes so distinctly crisp.
Metal/mesh filters let oils and some fine particles through, giving you a fuller, richer body — closer to what you’d get from a French press. Some glass pour over sets come with a built-in stainless steel mesh filter, which also means no ongoing filter costs.
Your preference here depends on what kind of coffee you enjoy. If you love a clean, tea-like cup where you can taste every origin note, paper is your friend. If you prefer a heavier, richer mouthfeel, go metal.
The Cone Shape
The angle and design of the cone — the part where the filter and coffee sit — affects flow rate and extraction. A Hario V60 has a large single hole at the bottom and internal spiral ridges that let air escape, giving you a faster flow and more control. A Chemex uses a thicker filter and a different cone shape that slows things down.
Neither is “better.” They’re different tools for different preferences. The V60 rewards precision and gives you a complex, nuanced cup. The Chemex is more forgiving and produces a consistently smooth, clean brew.
Glass Thickness and Build Quality
Cheap glass pour over makers use thin glass that chips easily and can crack with temperature changes. Look for borosilicate glass with a reasonable wall thickness. Brands like Chemex, Hario, and Kalita use quality glass that handles daily use well.
Pay attention to the handle or grip too. Some glass carafes have a glass handle, some use a wooden collar (like the classic Chemex), and some use a silicone sleeve. The wooden collar looks gorgeous but can get stained over time. Silicone is practical but less elegant. A glass handle is clean and simple, but it does get hot.
Step-by-Step: Brewing with a Glass Pour Over
You’ve got your glass pour over maker. Now let’s actually make coffee with it. This method works for most glass pour over setups — adjust ratios slightly based on your specific brewer.
What You’ll Need
A glass pour over coffee maker, freshly roasted whole bean coffee, a burr grinder (blade grinders work in a pinch, but burr grinders give you consistent particle size), a gooseneck kettle, a kitchen scale (optional but highly recommended), a timer, and filtered water.
The Process
Grind your coffee. Aim for a medium-fine grind — roughly the texture of table salt. You’ll need about 20 to 22 grams of coffee for a single 12-ounce cup. If you don’t have a scale, that’s roughly 3 level tablespoons, but weighing is much more reliable.
Getting the right grind is honestly half the battle with pour over. If you’re unsure about grind settings, understanding coffee grind sizes for different methods gives you a solid foundation to work from.
Heat your water. Bring it to about 200°F to 205°F — that’s roughly 30 seconds off a full boil. Water that’s too hot will over-extract and make your coffee bitter. Water that’s too cool won’t extract enough, leaving you with a flat, underwhelming cup.
Rinse your filter. Place the filter in the cone and pour hot water through it. This removes any papery taste (yes, it’s real, especially with thicker filters) and preheats your glass carafe. Dump the rinse water before you start brewing.
Add coffee and bloom. Put your ground coffee in the rinsed filter and give the setup a gentle shake to level the bed. Start your timer, then pour about twice the weight of your coffee in water (so about 40 to 44 grams of water for 20 to 22 grams of coffee). Pour slowly, starting from the center. Watch the grounds puff up and bubble. Wait 30 to 45 seconds.
Begin your main pour. Slowly pour water in a steady, circular motion. Keep the water level relatively consistent — don’t flood the grounds, and don’t let them dry out completely between pours. Some brewers prefer a continuous pour; others prefer multiple smaller pours (pulse pouring). Both work. Experiment and see what tastes better to you.
Hit your target. Your total water should be about 340 to 360 grams for that 20 to 22 grams of coffee. That’s roughly a 1:16 to 1:17 coffee-to-water ratio. Total brew time should be in the 3:00 to 4:00 minute range.
Enjoy immediately. Glass doesn’t retain heat well, so your coffee will cool down faster than it would in an insulated carafe. If you like your coffee piping hot, pour it into a preheated mug right away. And if you want to keep it warm for longer, a quality thermos is your best bet.
Did you know? The Specialty Coffee Association recommends a brew ratio between 1:15 and 1:18 for most manual brewing methods. Starting at 1:16 gives you a balanced cup that you can adjust from there — a little stronger or a little lighter based on your taste.
Glass Pour Over vs. Other Brewing Methods
You’ve got options. Lots of them. So where does a glass pour over fit in the bigger picture?
Glass Pour Over vs. Drip Coffee Maker
An automatic drip machine heats the water and distributes it for you. It’s convenient, consistent, and requires minimal effort. A glass pour over gives you full manual control, which means you can fine-tune every variable — but it also means you’re standing there for 4 to 5 minutes doing the work yourself.
The taste difference is real. Pour over coffee, when done right, has more clarity and complexity than most drip machines can produce. That said, high-end drip machines with shower-head water distribution (like the Technivorm Moccamaster) get surprisingly close.
If you brew for a crowd every morning before work, drip makes sense. If you brew one or two cups and enjoy the process, pour over wins.
Glass Pour Over vs. Chemex
Wait — isn’t the Chemex a glass pour over? Yes, it is. But people often search for “glass pour over” and “Chemex” as separate things, so it’s worth clarifying.
The Chemex is a specific brand of glass pour over maker. It uses proprietary thick paper filters that produce an exceptionally clean cup. Other glass pour over setups — like a Hario V60 glass dripper sitting on a glass server — use thinner filters and produce a different flavor profile with more body and oil.
For a deeper comparison, the Chemex pour over guide breaks down the Chemex-specific technique and what makes it unique.
Glass Pour Over vs. French Press
These two methods are almost opposites. French press is full immersion — coffee grounds steep in water, then a metal mesh plunger separates them. The result is heavy-bodied, rich, and slightly gritty. Glass pour over is percolation — water passes through grounds once and gets filtered. The result is clean, bright, and nuanced.
Neither is objectively better. Your preference depends entirely on what kind of coffee experience you enjoy. Many coffee lovers keep both around and switch based on mood or bean type.
Common Mistakes That Ruin Your Pour Over
Even experienced home brewers make these errors. The good news? They’re all easy to fix once you know what to look for.
Using Pre-Ground Coffee
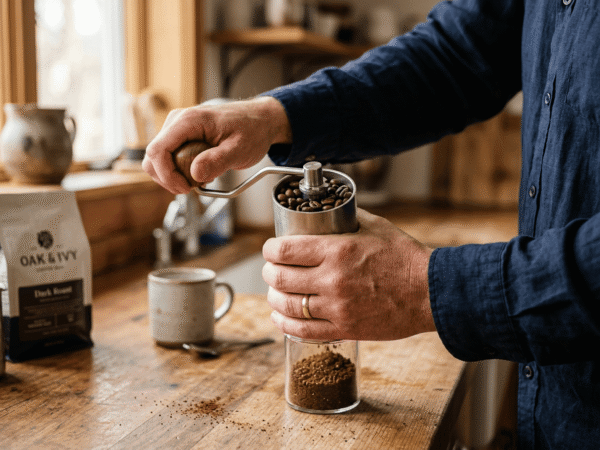
Pre-ground coffee starts losing flavor within minutes of being ground. By the time you use that bag you bought two weeks ago, you’ve lost a huge percentage of the aromatic compounds that make pour over coffee special. A decent burr grinder — even a hand coffee grinder — will transform your pour over experience more than any other single upgrade.
Ignoring Water Quality
Coffee is about 98 percent water. If your tap water tastes like chlorine or has a high mineral content, your coffee will reflect that. Filtered water is the easiest fix. You don’t need fancy bottled water — a basic carbon filter (like a Brita pitcher) removes enough chlorine and off-flavors to make a noticeable difference.
Pouring Too Fast
Dumping water quickly over the grounds might save you 30 seconds, but it creates channels — pathways where water rushes through without properly extracting the coffee around it. The result is a weak, unevenly flavored cup. Slow down. Think of it as a meditation, not a race.
Not Weighing Your Coffee
“Eyeballing” your coffee dose leads to inconsistency. Some mornings your cup will be great; others will be disappointingly thin or unpleasantly strong. A basic kitchen scale costs under $15 and removes all the guesswork. Once you start weighing, you’ll wonder how you ever brewed without it.
Using Water Straight Off the Boil
Boiling water (212°F) scorches coffee grounds and pulls out harsh, bitter compounds. Let your kettle rest for 30 to 60 seconds after boiling, or use a temperature-controlled kettle set to 205°F. That small temperature drop makes a surprisingly big difference in taste.
Caring for Your Glass Pour Over Maker
Glass is low-maintenance, but it does need some attention to stay in great shape.
After each use, discard the used filter and grounds, then rinse the glass with hot water. For daily cleaning, that’s usually enough. Once a week — or whenever you notice a brown film building up on the inside — give it a more thorough wash.
A simple mix of warm water and a drop of dish soap works fine. Use a soft bottle brush to reach the bottom of the carafe. Avoid abrasive sponges or scrubbers — they can scratch the glass surface, and scratches create places where coffee oils cling and go rancid.
For stubborn coffee stains, try this: fill the carafe with equal parts warm water and white vinegar, let it soak for 20 minutes, then scrub gently. The stains lift right off.
⚠️ Warning: Never put a hot glass carafe directly into cold water or onto a cold surface. The thermal shock can crack even borosilicate glass. Let it cool down first, or rinse it with warm water before cleaning.
If you want your freshly brewed coffee to stay hot while you clean up, pouring it into an insulated travel coffee mug right after brewing is the simplest solution.
Who Is a Glass Pour Over Coffee Maker Actually For?
Not every coffee method suits every person, and that’s okay. A glass pour over maker is a great fit if you enjoy the process of making coffee as much as drinking it, you value clean and nuanced flavors, you typically brew one to three cups at a time, and you don’t mind spending 5 to 7 minutes on your morning brew.
It’s probably not the best fit if you need coffee for a household of five people in a rush every morning, if you prefer the heavy, oily body of French press or espresso-style coffee, or if you have a tendency to break things (no judgment — some of us are just like that).
There’s also a middle ground. If you love the idea of pour over but want something more automated, an electric pour over coffee maker mimics the manual technique with programmable precision. You lose some of the hands-on ritual, but you gain consistency and convenience.
What to Look for When Buying: A Practical Checklist
Before you click “add to cart,” run through these considerations:
Budget. Basic glass pour over setups start around $10 to $15 for a simple dripper. A full Chemex setup (carafe, filters, maybe a kettle) can run $60 to $100+. The dripper itself is the cheapest part — the grinder and kettle are where the real investment is.
Filter availability. Make sure your chosen brewer uses filters that are easy to find and reasonably priced. Proprietary filters (like Chemex) cost more per unit than standard cone filters. Metal reusable filters cost more upfront but save money long-term.
Ease of cleaning. Wide-mouth carafes are much easier to clean than narrow-necked ones. If you’re considering a Chemex specifically, know that the narrow middle section can be tricky to scrub — a bottle brush is practically mandatory.
Replacement parts. Glass breaks. Before buying, check if the brand sells replacement carafes separately. Chemex, Hario, and most established brands do. Some cheaper no-name brands don’t, meaning one accident and you’re buying the whole thing again.
Choosing the right beans matters just as much as choosing the right brewer, so don’t overlook that part of the equation.
FAQ
Is a glass pour over coffee maker better than a ceramic one?
“Better” depends on what you value. Glass and ceramic are both non-reactive, meaning neither adds flavor to your coffee. Glass lets you see the brewing process, which helps with learning and consistency. Ceramic retains heat slightly better, keeping your coffee warmer during brewing. For most people, the difference in cup quality is minimal — it comes down to whether you prefer visual feedback (glass) or heat retention (ceramic).
How long does a glass pour over coffee maker last?
If you don’t break it, basically forever. Borosilicate glass doesn’t degrade, stain permanently, or wear out from normal use. Many Chemex owners have been using the same carafe for 10+ years. The fragility is the only real lifespan limiter. Treat it gently, and it’ll outlast most kitchen appliances.
Can I use a glass pour over coffee maker to make cold brew?
Not really — at least not in the traditional sense. Cold brew requires coffee grounds to steep in cold water for 12 to 24 hours (full immersion). A pour over is a percolation method, meaning water passes through grounds once. You could technically pour cold water slowly over grounds in your pour over setup, but the result won’t be true cold brew. For that, you’ll want a dedicated cold brew coffee maker. That said, you can use your glass pour over to make hot coffee and then chill it over ice for a Japanese-style iced coffee — which many people actually prefer over cold brew for its brighter, more complex flavor.
What grind size should I use for a glass pour over?
Medium-fine works for most glass pour over brewers — think table salt consistency. For a Chemex with its thicker filters, you can go slightly coarser (closer to medium). For a Hario V60, many people prefer a slightly finer grind. Start at medium-fine and adjust based on your brew time: if coffee drains too fast (under 2:30), go finer; if it takes too long (over 4:30), go coarser.
Are glass pour over coffee makers worth the investment?
If you enjoy good coffee and don’t mind a few minutes of hands-on brewing, absolutely. The brewer itself is inexpensive — $15 to $50 covers most quality options. The ongoing cost is just filters (pennies each) and good coffee beans. Compared to daily café visits at $5 to $7 per cup, a glass pour over pays for itself within the first week or two. The real investment isn’t money — it’s the small amount of time and attention each brew requires. For many people, that time becomes the best part of their morning.
Your Next Step
A glass pour over coffee maker isn’t trying to be the fastest, the easiest, or the most high-tech way to make coffee. It’s trying to be the most honest. You control every variable, you see every drop being brewed, and you taste the result of your own attention and care.
Start simple. Pick up a basic glass dripper, grab some fresh beans, and follow the steps above. Your first few cups might not be perfect — that’s normal. But within a week of daily brewing, you’ll develop a feel for the process. You’ll learn how your grind, your water temperature, and your pour speed all change the flavor in your mug. And one morning, you’ll take that first sip and think, “Yeah, this is why people do this.”
That’s the moment that makes all the learning worth it.