The Chemex coffee maker was invented in 1941 by a German chemist named Peter Schlumbohm — and here’s the wild part — it’s barely changed since then. That hourglass-shaped glass brewer sits in the permanent collection of the Museum of Modern Art in New York. Not many kitchen tools can say that.
But the Chemex isn’t just pretty to look at. It makes one of the cleanest, smoothest cups of pour over coffee you’ll ever taste. If you’ve been curious about why so many coffee lovers swear by it — or you just bought one and you’re staring at it wondering what to do next — you’re in the right place.
This guide walks you through everything: how the Chemex pour over works, what makes it different from other brewers, the exact technique to get a great cup, and the little mistakes that can mess things up. No fluff. Just the stuff that actually helps.
What Makes the Chemex Pour Over Different?
You might look at a Chemex and think it’s just another glass pour over dripper. It isn’t. The secret is in the filter.
Chemex uses its own proprietary bonded paper filters that are 20-30% thicker than standard pour over filters. That extra thickness does something really noticeable — it traps more oils, fats, and fine sediment from the coffee grounds. The result? A cup that’s remarkably clean and bright. You taste the origin flavors of the beans — fruit notes, florals, chocolate undertones — without any heaviness or grit.
Compare that to a French press, which lets oils and fine particles through freely, and you’ll understand why people describe Chemex coffee as “tea-like” in its clarity. That’s not an insult. It’s a genuine style preference.
The glass vessel itself is made from non-porous borosilicate glass — the same stuff lab equipment is made from. It doesn’t absorb odors. It doesn’t impart any flavor. Your coffee tastes like coffee, nothing else.
And then there’s the design itself. The wooden collar wrapped with a leather tie isn’t just decoration — it’s your handle. No plastic, no metal hardware. Schlumbohm designed it to be one single piece of glass with nothing to break down or wear out over time.
Quick fact: The Chemex comes in multiple sizes — 3-cup, 6-cup, 8-cup, and 10-cup. The “cups” here refer to 5-ounce servings, not full mugs. So a 6-cup Chemex makes roughly 30 ounces, which is about two normal-sized mugs of coffee.
The Equipment You’ll Need
Before you start brewing, let’s make sure you have everything ready. The Chemex method isn’t complicated, but having the right setup makes a real difference.
Your Chemex brewer — obviously. Pick the size that matches how much coffee you typically drink. For most people, the 6-cup or 8-cup hits the sweet spot.
Chemex bonded filters — These come in square and circular shapes, and in bleached (white) or natural (brown) versions. Both work the same way. The white ones are oxygen-bleached, not chlorine-bleached, so don’t worry about chemicals. Some people say the natural filters can leave a faint papery taste if you don’t rinse them well. More on rinsing in a minute.
A gooseneck kettle — This is the one accessory I’d call nearly essential. A regular kettle pours water too fast and too unevenly. A gooseneck gives you a slow, controlled stream, which matters a lot for even extraction. Electric gooseneck kettles with temperature control (like the Fellow Stagg EKG or Bonavita variable temp) make life easier, but a stovetop gooseneck works fine too.
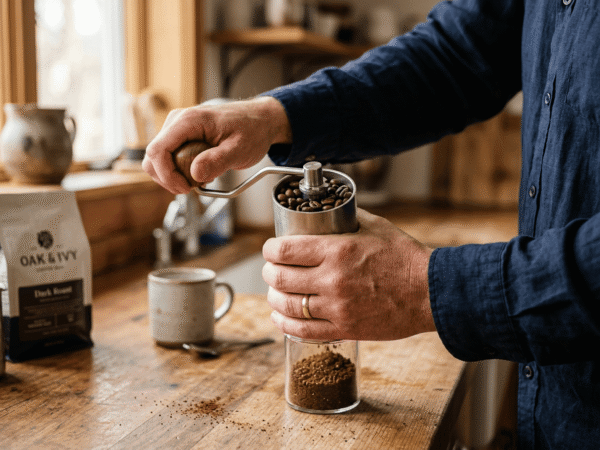
A burr grinder — Pre-ground coffee will work in a pinch, but freshly ground beans taste noticeably better. You want a medium-coarse grind for Chemex — roughly the texture of coarse sea salt. If you’re looking for options, a solid hand coffee grinder gives you great consistency without spending a fortune on an electric model.
A kitchen scale — Measuring coffee by scoops is unreliable. A gram scale costs under $15 and takes all the guesswork out of your ratio. Trust me on this one.
A timer — Your phone’s built-in timer works perfectly.
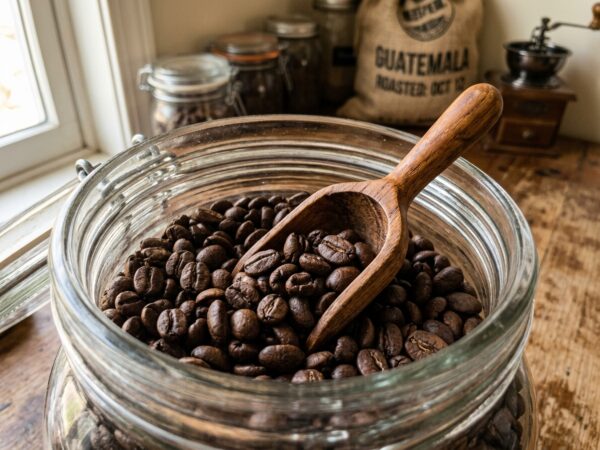
Fresh coffee beans — Buy whole beans roasted within the last 2-4 weeks. Light to medium roasts tend to shine in the Chemex because the clean extraction highlights their complexity. Dark roasts work too, but you’ll lose some of the brightness the Chemex is known for. If you need recommendations on selecting quality beans, this guide on the best coffee beans is a solid starting point.
The Right Grind Size for Chemex
This is where a lot of people trip up, and it’s worth spending a moment here because grind size affects your brew more than almost any other variable.
For Chemex pour over, you want a medium-coarse grind. Think sea salt — not fine table salt, and not chunky rock salt. Somewhere right in between.
Why does this matter so much? Because the Chemex filter is so thick, water already passes through it more slowly than through a thinner pour over filter. If your grind is too fine, water struggles to drip through. Your brew time stretches past 5 or 6 minutes, and you end up with bitter, over-extracted coffee that tastes harsh.
Go too coarse, and water rushes through before it has time to pull enough flavor from the grounds. You’ll get a weak, sour, watery cup. Not what you signed up for.
Pro Tip: If your total brew time (including the bloom) is consistently over 5 minutes, your grind is probably too fine. If it’s finishing under 3 minutes, go finer. The sweet spot for most Chemex brews is between 3.5 and 4.5 minutes total.
Start with a medium-coarse setting on your grinder and adjust from there based on taste. Every grinder labels its settings differently, so you’ll need to experiment a little. This is normal. Even experienced brewers dial in their grind when they switch to new beans.
Chemex Pour Over: Step-by-Step Brewing Method
Alright, here’s the actual process. I’m going to walk you through making a 6-cup Chemex brew (roughly 700ml / 24 oz of finished coffee), which is enough for two generous mugs.
Step 1 — Heat Your Water
Bring fresh, filtered water to about 200-205°F (93-96°C). If you don’t have a temperature-controlled kettle, just bring water to a full boil and let it sit off the heat for about 30-45 seconds. That usually gets you into the right range.
Why not boiling water? At 212°F, water scorches the grounds and pulls out harsh, bitter compounds. Too cool (under 195°F), and you’ll under-extract, leaving your coffee tasting flat and sour.
Heat more water than you think you’ll need. You’ll use some for rinsing the filter, and the rest for brewing.
Step 2 — Prepare the Filter
Open up a Chemex bonded filter. It has multiple layers — one side has three layers and the other side has one. Place the filter in the top of the Chemex with the three-layered side facing the spout. This is important because it creates a small air channel along the spout that lets air escape as water drips down. Without that channel, you’d get an airlock and your brew would stall.
Now pour hot water over the entire filter, wetting it thoroughly. This does two things: it removes any papery taste from the filter, and it preheats the glass vessel so your coffee doesn’t lose temperature the moment it hits cold glass.
Once the rinse water drains through, pour it out through the spout. Don’t remove the filter to dump the water — just tip the Chemex and pour. Then set it back upright with the filter still in place.
Step 3 — Measure and Add Coffee
For a 6-cup Chemex, weigh out 42 grams of coffee. This follows a roughly 1:16 coffee-to-water ratio (42g coffee to ~680g water), which is a reliable starting point for most people.
Grind those beans to medium-coarse, add them to the rinsed filter, and give the Chemex a gentle shake to level the coffee bed. An even bed means even extraction.
Step 4 — The Bloom
Start your timer. Pour about 80-100 grams of water (roughly double the weight of your coffee) over the grounds in slow, concentric circles. Make sure all the grounds get wet.
You’ll see the coffee bed swell and bubble. Those bubbles are carbon dioxide escaping from the fresh grounds. This is called the bloom, and it’s a sign your coffee is fresh. Stale beans barely bloom at all.
Let the bloom sit for 30-45 seconds. Don’t skip this step. If you pour all the water right away, that trapped CO2 creates an uneven extraction because gas literally pushes water away from certain grounds. The bloom releases that gas so your actual brew can extract evenly.
Step 5 — The Main Pour
After the bloom, start your main pour. Here’s where technique matters.
Pour in a slow, steady spiral starting from the center of the coffee bed and moving outward toward the edge — but stop about a finger’s width from the glass wall. You don’t want to pour directly onto the filter because water will run straight down the sides and bypass the coffee entirely. That’s basically adding plain hot water to your finished coffee. Not great.
Pour in stages. Add about 150-200 grams of water at a time, let the water level drop by about an inch, then pour again. Keep the water level in the brewer relatively consistent — don’t let it drain completely between pours, and don’t fill it to the brim.
Your pouring rhythm should feel steady and patient. This isn’t something to rush. The gooseneck kettle really earns its place here because you can control exactly where the water lands and how fast it flows.
Step 6 — Watch the Clock
Your total brew time (from the first drop of bloom water) should land somewhere around 3.5 to 4.5 minutes. When all the water has drained through, you’re done.
Pull the filter out (careful, it’s full of wet grounds and it’s heavy), and give the brewed coffee in the Chemex a gentle swirl. This mixes everything together since the first coffee to drip through is stronger than the last.
Pour. Drink. Enjoy.
Did you know? The Chemex was famously used by James Bond. In Ian Fleming’s novel From Russia With Love (1957), Bond makes his coffee with a Chemex. Not an espresso machine. A Chemex. Even fictional spies appreciate clean coffee.
Getting Your Coffee-to-Water Ratio Right
Ratios aren’t a one-size-fits-all thing, but they give you a reliable launchpad. Here’s what works for most Chemex brewers:
A 1:15 ratio produces a stronger, more intense cup. Try 42g of coffee to 630g of water if you like your coffee bold.
A 1:16 ratio is the middle ground — balanced strength, good clarity. This is what I recommend starting with. That’s 42g coffee to 672g water.
A 1:17 ratio gives you a lighter, more delicate cup. Great for showcasing fruity or floral light roasts. Use 42g coffee to about 714g of water.
The right ratio depends on your beans, your grind, your water, and honestly your personal taste. Start with 1:16 and adjust from there. If your coffee tastes too strong or harsh, add more water next time. If it’s thin and underwhelming, use more coffee or slightly less water.
Pro Tip: Always measure by weight, not volume. A “tablespoon” of coffee varies wildly depending on the bean density, roast level, and how finely it’s ground. Weight is consistent. Weight doesn’t lie.
Water Quality: The Overlooked Variable
Your brewed coffee is roughly 98% water. Read that again. If your water tastes bad, your coffee will taste bad. It’s that simple.
Tap water with heavy chlorine or mineral content can make your Chemex coffee taste flat, metallic, or just “off.” On the flip side, distilled or reverse-osmosis water — which has almost zero mineral content — actually makes worse coffee because those minerals help extract flavor compounds from the grounds.
The sweet spot is filtered water with a total dissolved solids (TDS) count between 75-150 ppm. A standard Brita or carbon filter usually gets you there. The Specialty Coffee Association (SCA) has published water quality standards for brewing, and most filtered tap water falls within acceptable range.
If you’ve ever brewed the same beans in two different cities and gotten wildly different results, water is probably why.
Chemex vs. Other Pour Over Methods
You might be wondering how the Chemex stacks up against other pour over brewers. The differences are real, and they come down to what you prioritize in your cup.
Chemex vs. Hario V60
The V60 uses thinner paper filters and has prominent spiral ridges inside the cone that create air channels. Water flows through faster, and the thinner filter lets more oils pass into your cup. V60 coffee is brighter and a bit more complex — but also less forgiving of technique mistakes. The Chemex is more consistent and produces a cleaner cup. If you’re curious about how these two iconic brewers compare in more detail, there’s a solid breakdown of V60 vs. Chemex differences worth reading.
Chemex vs. Standard Drip Coffee Maker
An automatic drip machine heats and distributes water for you, so it’s more hands-off. But most drip machines can’t match the Chemex’s extraction quality because they don’t control water temperature or distribution as precisely. If convenience matters most, a quality drip coffee maker saves time. If flavor clarity matters most, the Chemex wins.
Chemex vs. French Press
These two are almost opposites. French press is a full-immersion method that produces a thick, oily, heavy-bodied cup. Chemex pour over makes a light, clean, sediment-free cup. Neither is objectively “better” — it depends entirely on what you enjoy. You can explore that matchup in depth through this Chemex vs. French press comparison.
Common Mistakes That Ruin Your Chemex Brew
Even with good beans and the right equipment, a few small errors can tank your cup. Here’s what to watch for.
Pouring too fast. If you dump water in quickly, it floods the grounds unevenly. Some coffee over-extracts while other grounds barely get touched. Slow and steady wins here — your total pour time should be 3-4 minutes, not 90 seconds.
Ignoring the bloom. Skipping the bloom or cutting it short means trapped CO2 is still in the grounds when you pour. This causes channeling (water finding paths of least resistance through the coffee bed instead of flowing through evenly), and you’ll get an inconsistent, sour-tinged brew.
Grinding too fine. This is the most common mistake for people switching to Chemex from other pour over methods. The thick filter means you need a coarser grind than you’d use for, say, a Kalita Wave or V60. If your brew takes 6+ minutes and tastes bitter, go coarser immediately.
Using old coffee. Coffee beans start losing their aromatic compounds and CO2 within days of roasting. By 4-6 weeks post-roast, the flavor has degraded noticeably. For Chemex — which highlights delicate flavors — fresh beans make a dramatic difference. Proper coffee bean storage helps extend freshness, but nothing replaces buying beans that were roasted recently.
Not rinsing the filter. I know I mentioned this in the brewing steps, but it’s worth repeating because people skip it constantly. An unrinsed Chemex filter adds a distinct papery taste to your coffee. It takes 15 seconds to rinse. Just do it.
Pouring water onto the filter walls. Any water that hits the filter above the coffee bed runs directly down the glass and into your carafe without touching the grounds. You’re literally diluting your coffee with plain hot water. Keep your pour centered on the coffee bed.
Caring for Your Chemex
The Chemex is beautifully simple, but it needs a little care to stay that way.
After each brew, remove the spent filter and grounds (compost them if you can — coffee grounds are great for gardens). Rinse the Chemex with hot water right away. If you let coffee dry inside the glass, it stains, and that residue affects the taste of future brews.
For a deeper clean, use a bottle brush with warm soapy water once a week, or whenever you notice any buildup. Some people drop in a denture cleaning tablet with warm water and let it fizz for 20 minutes. It works surprisingly well.
The wooden collar and leather tie should be removed before any serious washing. They’re not meant to get soaked. If the leather tie gets wet, let it air dry away from direct heat.
Warning: The Chemex is a single piece of glass (minus the collar). It’s beautiful, but it can break. Don’t put it in the dishwasher — the thermal shock from the drying cycle can crack it. Don’t set a hot Chemex on a cold, wet surface either. Treat it gently, and it’ll last for years.
You can buy replacement wooden collars and leather ties if yours wear out. The glass itself, if you take care of it, is incredibly durable.
Who Is the Chemex Best For?
Not every brewer is right for every person. The Chemex has a specific personality, and it attracts a specific type of coffee drinker.
You’ll love the Chemex if you prefer clean, bright, nuanced coffee. If you enjoy tasting the difference between a washed Ethiopian and a natural processed Colombian, the Chemex makes those differences crystal clear. It’s also ideal if you typically brew for two people — the 6-cup and 8-cup models make enough for a couple of mugs without any waste.
The Chemex might not be your thing if you crave thick, full-bodied, oily coffee. In that case, a French press or a moka pot will make you happier. It also isn’t the best choice if you’re always in a rush in the morning — the total process (heating water, rinsing, blooming, pouring) takes about 7-8 minutes of active involvement. If time is tight, an electric pour over coffee maker automates most of the work while still delivering good results.
And if you want espresso-style intensity, you’re looking at the wrong brewer entirely. The Chemex does what it does — clean, smooth, clarity-focused coffee — and it does it exceptionally well. But it’s not trying to be something it isn’t.
FAQ
What grind size should I use for a Chemex pour over?
Use a medium-coarse grind, similar to the texture of sea salt. The thick Chemex filters require a coarser grind than most standard pour over drippers. If your brew takes longer than 5 minutes to drain, your grind is too fine. If it finishes in under 3 minutes, go finer. Adjust based on taste — bitterness means too fine, sourness means too coarse.
How many grams of coffee do I need for a 6-cup Chemex?
For a 6-cup Chemex, start with 42 grams of coffee and roughly 672 grams of water. That gives you a 1:16 coffee-to-water ratio, which is a balanced starting point. You can adjust stronger (1:15) or lighter (1:17) based on your taste preference.
Can I use regular paper filters in a Chemex?
Technically, you can fold a standard #4 cone filter to fit, but it won’t perform the same way. Chemex bonded filters are significantly thicker, which is what gives Chemex coffee its signature clean taste. Using thinner filters lets more oils and sediment through, and the cup will taste different — closer to a standard drip brew. For the authentic Chemex experience, use Chemex filters.
Why does my Chemex coffee taste bitter?
Bitterness usually points to over-extraction. The most common cause is grinding too fine, which forces water to stay in contact with the grounds too long. Other causes include water that’s too hot (over 205°F), pouring too slowly, or using a dark roast that’s already heavy on bitter compounds. Try a coarser grind first — that fixes the problem most of the time.
How do I keep my Chemex coffee hot?
Glass doesn’t insulate well, so Chemex coffee cools down relatively quickly. You can preheat your mug with hot water before pouring. If you’re brewing a larger batch, transferring the finished coffee into a preheated thermal carafe or thermos keeps it hot for hours. Don’t put the Chemex on a stovetop burner to reheat it — you’ll crack the glass, and reheated coffee tastes stale anyway.
Your Next Morning Could Taste Very Different
The Chemex pour over isn’t complicated. It’s just intentional. You heat good water, grind fresh beans, pour slowly, and pay attention for about four minutes. That’s it. No fancy barista skills required.
What you get in return is a cup of coffee that actually tastes like the beans it came from — clean, clear, and honestly kind of eye-opening if you’ve only ever had drip or French press. There’s a reason this brewer has survived for over 80 years without needing a redesign.
Start with the 1:16 ratio and a medium-coarse grind. Nail those two things, and you’re already 80% of the way to great Chemex coffee. The other 20% comes from small adjustments you’ll figure out naturally after a few brews.
Your morning routine just got a little more rewarding.