The siphon brewer was invented in the 1840s — and almost two centuries later, it still makes some of the cleanest, most flavorful coffee you’ll ever taste. That’s not nostalgia talking. There’s real science behind why this brewing method pulls out flavors that most other techniques simply can’t match.
But here’s the thing. Most people see a siphon brewer sitting on a café counter and think it’s only for professionals or chemistry nerds. It looks complicated, right? Glass chambers, an open flame, water rising and falling between vessels. The whole setup feels more like a lab experiment than a morning coffee ritual.
The truth? Siphon brewing isn’t nearly as intimidating as it looks. Once you understand how it works and nail a few key variables — water temperature, grind size, brew time — you can make exceptional coffee at home with surprising consistency. This guide walks you through every part of the process, from picking the right equipment to troubleshooting common problems. Whether you’ve never touched a siphon or you’ve tried and gotten inconsistent results, you’ll find what you need here.
What Exactly Is Siphon Coffee (And Why Should You Care)?
A siphon brewer — also called a vacuum brewer or vacuum pot — uses two stacked glass chambers connected by a tube and filtered by a cloth or metal screen. You heat water in the bottom chamber. As the water heats up, vapor pressure pushes it upward into the top chamber where it mixes with your ground coffee. When you remove the heat source, the vacuum created in the bottom chamber pulls the brewed coffee back down through the filter, separating it from the grounds.
That’s the basic mechanism. But why does this matter for your cup?
The magic lies in the temperature stability. During the entire brewing phase, the water stays remarkably consistent — typically between 185°F and 195°F (85°C to 91°C). Most other manual methods struggle with this. With a pour over or a French press, your water starts cooling the moment it leaves the kettle. A siphon keeps the temperature steady because the heat source stays active throughout the brew.
The result? You get a cup that’s incredibly clean — no sediment, no oils floating on top — with a brightness and clarity that highlights the coffee’s origin flavors. If you’ve ever tasted a light-roast Ethiopian coffee brewed in a siphon, you know exactly what I’m talking about. The floral and fruit notes just pop in a way they don’t with immersion methods.
There’s also the full immersion aspect. Your coffee grounds sit completely submerged in hot water for the entire brew time, which gives you more even extraction than drip methods. Think of it as getting the best of both worlds — the immersion saturation of a French press combined with the clean filtration of a pour over.
The Equipment You’ll Need
Before we get into technique, let’s talk gear. Siphon brewing doesn’t require a huge investment, but choosing the right components makes a real difference in your results.
The Siphon Brewer Itself
The two most popular brands are Hario and Yama. Hario’s Technica series (especially the TCA-3 and TCA-5 models) has been the go-to for home brewers and specialty cafés for years. Yama’s tabletop models offer similar quality with slightly different aesthetics. Both work well. If you’re buying your first siphon, a 3-cup Hario Technica typically runs between $50 and $80 and is a great starting point.
The Heat Source
This is where you have options, and your choice genuinely affects your brew.
A butane burner is the most common pairing with tabletop siphons. It gives you adjustable flame control and heats water reasonably fast. The small alcohol burners that come packaged with many siphons? They work, but they’re slow and hard to control. If you’re serious about consistency, skip the alcohol burner.
A halogen beam heater is the premium option. Brands like Hario make dedicated beam heaters that sit underneath your siphon and provide extremely even, controllable heat. They’re pricier — often $150 to $300 — but they eliminate the inconsistency of an open flame. Many competition baristas and high-end cafés use these exclusively.
You can also use a gas stovetop if you have a stovetop siphon model, though controlling the flame precisely takes practice.
The Filter
Siphon brewers use either cloth, metal, or paper filters. Each one changes your cup profile noticeably.
Cloth filters are the traditional choice. They produce the cleanest, sweetest cup because they trap fine particles and most oils while still allowing flavor compounds through. The downside? Maintenance. You need to rinse cloth filters after every use, store them in water in the fridge, and replace them every 50-100 brews. If you don’t clean them properly, old coffee oils go rancid and taint your next brew.
Metal filters are more convenient — just rinse and go. But they let more fine particles and oils through, giving you a slightly heavier body similar to what you’d get from a French press. Some people prefer this; others don’t.
Paper filters are the easiest to maintain (use once, toss), and they give you an extremely clean cup. They can filter out too much, though, muting some subtle flavor notes.
My recommendation for most people? Start with cloth. Yes, the maintenance is a minor hassle. But the cup quality is worth it, and once you build the habit of rinsing and storing your filter, it becomes second nature.
A Good Grinder
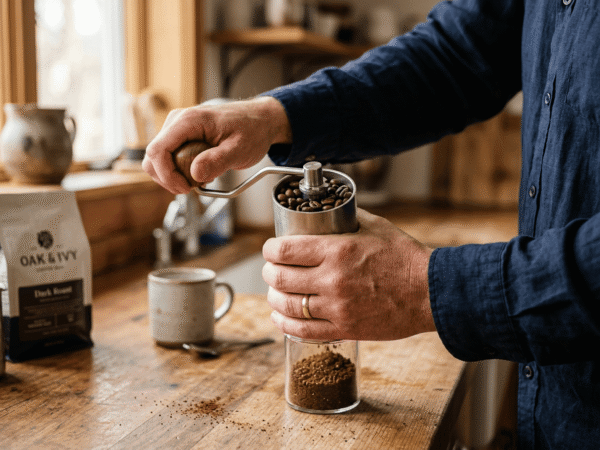
Grind consistency matters enormously with siphon brewing. You want a medium grind — slightly finer than what you’d use for drip coffee, but coarser than espresso. Think table salt texture.
A quality burr grinder makes a huge difference here. Blade grinders produce wildly inconsistent particle sizes, which means some coffee extracts too much while other particles under-extract. The result is a muddled, bitter-sour cup. If you don’t have a burr grinder yet, check out some solid options in our guide to choosing a hand coffee grinder.
A Scale and Timer
You need both. Siphon brewing is sensitive to dose and time — even 15 seconds too long can push your coffee into over-extraction. A basic kitchen scale that reads in grams and a phone timer are all you need.
How to Brew Siphon Coffee: The Step-by-Step Process
Alright. You’ve got your gear. Let’s actually make some coffee.
I’m going to walk you through a recipe that works as a reliable starting point. You’ll likely tweak the variables after a few brews to suit your taste, and that’s exactly how it should work.
The Starting Recipe
For a standard 3-cup Hario siphon, use 25 grams of coffee to 375 grams (milliliters) of water. That’s a 1:15 ratio. If you prefer a slightly stronger cup, go 1:14. For something lighter and more tea-like, try 1:16.
Step 1: Heat Your Water
Fill the bottom chamber with your measured water. Some people use pre-heated water from a kettle to speed things up — this is actually a smart move because it reduces the total time your equipment is exposed to heat and gives you more control over the brewing phase.
Place the bottom chamber on your heat source and start heating.
Step 2: Prepare Your Filter and Top Chamber
While the water heats, soak your cloth filter in hot water for 30 seconds (this removes any storage odors and primes the cloth). Attach it to the top chamber’s tube, making sure the chain and clip are secure at the bottom.
Insert the top chamber into the bottom one at a slight angle. Don’t seal it fully yet — just rest it in place. You want to let steam escape until the water is nearly ready. This prevents premature water rise.
Step 3: Let the Water Rise
Once the water reaches a strong simmer — you’ll see active bubbles — push the top chamber down to create a full seal. Within 30 to 60 seconds, vapor pressure will push most of the water up into the top chamber. A small amount will remain in the bottom, and that’s normal. Those few milliliters keep bubbling and maintain the pressure that holds the water up top.
Pro Tip: If you’re using pre-heated water, this phase goes much faster. Don’t walk away — you want to be ready to add your coffee the moment the water finishes rising.
Step 4: Add Your Coffee and Stir
Once the water has risen fully into the top chamber, add your ground coffee. Start your timer immediately.
Give the grounds a gentle but thorough stir using a bamboo paddle or a spoon. You want every particle saturated — no dry clumps floating on the surface. Stir in a cross pattern (north-south, then east-west) rather than circular motions. Circular stirring can create a vortex that pushes grounds to the edges and leads to uneven extraction.
Step 5: Brew
Total brew time in the top chamber should be 60 to 90 seconds. During this time, lower your heat source slightly — you want just enough heat to keep the water up top, but you don’t want it at a rolling boil. Aggressive boiling pushes water temperature too high and extracts bitter compounds.
At the 45-second mark, give one more gentle stir. This breaks up the crust that forms on top and ensures even contact between water and coffee.
Step 6: Remove Heat and Draw Down
At the 60 to 90 second mark (I recommend starting at 75 seconds and adjusting from there), remove your heat source completely.
This is where the spectacle happens. As the bottom chamber cools, it creates a vacuum that pulls the brewed coffee down through the filter. You’ll see a beautiful dome of spent grounds form at the top, and the liquid below should be clear and golden-amber.
The drawdown typically takes 45 to 90 seconds. If it’s much faster than that, your grind might be too coarse. If it’s very slow or stalls, your grind is too fine.
Step 7: Serve
Carefully remove the top chamber (it’ll be hot — use a cloth) and place it on the stand that comes with most siphon kits. Pour your coffee and give it a minute or two to cool to drinking temperature.
Siphon coffee tastes best when it’s not scalding hot. Around 140°F to 155°F (60°C to 68°C), the flavor compounds really open up. If you want to keep it warm while you enjoy it slowly, a quality thermos works better than reheating.
Dialing In Your Brew: Variables That Matter
Your first siphon brew probably won’t be perfect. That’s fine. The beauty of this method is how responsive it is to small adjustments. Here’s what to tweak and when.
Grind Size
This is your most powerful lever. If your coffee tastes sour, thin, or watery, your grind is too coarse — the water passed through too quickly and didn’t extract enough. Go finer. If it tastes bitter, harsh, or astringent, your grind is too fine — you over-extracted. Go coarser.
The ideal grind for siphon sits in that sweet spot between drip and pour over. It’s medium, but leaning slightly toward the finer side. If you’re familiar with French press grind size, siphon grind is noticeably finer than that — maybe two to three clicks finer on most grinders.
Water Temperature
You don’t have direct temperature control during siphon brewing the way you do with a kettle-based method. But you control it indirectly through your heat source. The key principle: once the water rises to the top chamber, reduce the flame. You want a gentle simmer in the bottom, not a vigorous boil. If you see large, aggressive bubbles pushing up through the top chamber, your temperature is too high.
Ideal brewing temperature in the upper chamber hovers around 185°F to 195°F (85°C to 91°C). Some experienced siphon brewers use a thermometer clipped to the top chamber to monitor this, at least while they’re learning.
Brew Time
The standard window is 60 to 90 seconds in the top chamber (after adding coffee, before removing heat). Shorter brew times emphasize brightness and acidity. Longer brew times bring out more body and sweetness but risk tipping into bitterness.
A good strategy: start at 75 seconds. If the cup is too sharp or sour, go longer next time. If it’s bitter or heavy, go shorter.
Coffee-to-Water Ratio
The 1:15 ratio is your baseline. But different coffees respond differently. Lighter roasts often benefit from a slightly higher dose (1:14) because they’re denser and harder to extract. Darker roasts can taste great at 1:16 because they’re more soluble and extract faster.
Best Coffee Beans for Siphon Brewing
Not all coffee shines equally in a siphon. Because this method produces such a clean, transparent cup, it tends to reward coffees that have interesting and complex flavor profiles.
Light to medium roasts are the sweet spot. Single-origin beans from Ethiopia, Kenya, Colombia, and Guatemala tend to be spectacular in a siphon. The clarity of the brew lets you taste origin characteristics — fruit, floral, chocolate, citrus — without the muddiness that other methods can introduce.
Dark roasts aren’t a bad choice, but the siphon’s transparency can actually work against them. The smoky, roasty notes that dark roasts are known for can taste a bit one-dimensional when brewed this way. If you love dark roast, a French press or Moka pot might serve those beans better.
Freshness matters here more than with many methods. Because the siphon extracts so cleanly, stale coffee has nowhere to hide. Use beans roasted within the past two to four weeks, and grind right before brewing. If you’re looking for high-quality bean recommendations, our guide to the best coffee beans covers several options that pair beautifully with siphon brewing.
And speaking of freshness — how you store your beans between brews makes a real difference. Proper coffee bean storage keeps oxygen and moisture from degrading flavor compounds before they even hit the grinder.
Troubleshooting Common Siphon Problems
Even experienced siphon brewers run into issues. Here are the ones that come up most often, along with straightforward fixes.
“My Coffee Tastes Bitter and Harsh”
The usual culprit is over-extraction. Either your grind is too fine, your brew time is too long, or your water temperature is too high. Try coarsening your grind by one or two settings first — that’s the easiest variable to adjust. If you’re already at a medium grind, shorten your brew time to 60 seconds and make sure you’re reducing the flame once the water rises.
“My Coffee Tastes Sour or Weak”
Under-extraction. Your grind is likely too coarse, or you’re not brewing long enough. Go finer. You can also try increasing your dose slightly — sometimes going from 25 grams to 27 grams for the same amount of water adds enough body to balance things out.
“The Water Won’t Rise to the Top Chamber”
Check your seal. The top chamber needs to sit firmly and evenly in the bottom chamber for vapor pressure to work. Also, make sure your filter is properly seated. If the filter chain is loose or the cloth isn’t centered, air can leak and prevent the pressure differential you need.
“The Drawdown Is Taking Forever”
Your grind is too fine. When coffee particles are too small, they clog the filter and slow the drawdown to a crawl. This also leads to over-extraction, since the coffee stays in contact with water for too long. Coarsen your grind and see if the drawdown returns to the normal 45-90 second range.
“The Drawdown Is Almost Instant”
Opposite problem — grind too coarse. The filter isn’t encountering enough resistance, so the coffee rushes through before it has a chance to extract properly. Go finer.
“My Cloth Filter Smells Funky”
This happens when you don’t clean and store the filter correctly. After every brew, rinse the cloth thoroughly under hot water. Don’t use soap — it’ll leave residue that affects taste. Then place it in a small container of clean water and store it in the fridge. Change the water daily if possible. Replace the filter entirely every 50 to 100 uses, or sooner if you notice off-flavors despite proper cleaning.
Siphon Coffee vs. Other Brewing Methods: Where Does It Fit?
If you’re already brewing with other manual methods, you might wonder where the siphon fits into your rotation. Here’s an honest comparison.
Siphon vs. French Press: The French press gives you a heavy, oily, full-bodied cup. The siphon gives you clarity and brightness. They’re almost opposite ends of the spectrum. If you enjoy the thickness of French press coffee, the siphon’s clean cup might feel “thin” to you at first — but give it a few tries. The flavor detail you gain is remarkable. You can read more about how the French press compares to other methods to understand these differences better.
Siphon vs. Pour Over: These two methods are closer relatives. Both produce clean, nuanced cups. The siphon edges ahead on temperature consistency and extraction evenness because of its full-immersion approach. Pour overs give you more control over flow rate and water distribution. If you’re deciding between them, consider this: siphon rewards patience and precision with temperature; pour over rewards pouring technique.
Siphon vs. Drip Coffee Maker: A drip coffee maker is built for convenience. Set it, walk away, come back to a full pot. The siphon is the opposite — it demands your attention for the full 8 to 10 minutes of the process. But the cup quality isn’t even in the same neighborhood. If you drink coffee for the experience and flavor, the siphon wins every time. If you need caffeine fast on a Tuesday morning, the drip maker earns its place.
Siphon vs. AeroPress: The AeroPress is compact, fast, and nearly unbreakable. The siphon is fragile, slower, and takes up counter space. But the siphon produces a larger volume per brew and offers a different flavor profile — more delicate and transparent compared to the AeroPress’s concentrated, slightly pressurized extraction.
The honest answer? The siphon doesn’t replace other methods. It adds a different dimension to your coffee experience. Most serious coffee drinkers use it when they want to showcase a really special bag of beans — the kind where you want to taste every single note the roaster intended.
Caring for Your Siphon Brewer
Glass siphon brewers aren’t the most rugged pieces of equipment. A few care habits will keep yours working beautifully for years.
Handle the glass chambers carefully, especially when they’re hot. Thermal shock — putting a hot glass chamber on a cold surface or running cold water over it — can crack the glass. Let everything cool to room temperature before washing.
Clean the chambers with warm water and a soft brush after every use. Coffee oils build up on glass over time, and those old oils will make fresh coffee taste flat and stale. If you notice a brownish film inside the chambers, a soak in a solution of water and baking soda works well. Avoid harsh chemical cleaners.
Check the rubber gasket where the top and bottom chambers connect. These gaskets wear out over time and lose their seal. If you start having trouble with water not rising fully, a worn gasket is often the problem. Replacement gaskets are inexpensive and easy to swap.
Store the siphon in a spot where it won’t get knocked over. This sounds obvious, but those tall, narrow glass chambers are just waiting for an elbow bump. Many siphon kits come with a storage box — use it if you don’t brew siphon coffee every day.
FAQ
How long does it take to brew coffee with a siphon?
The entire process — from filling the bottom chamber with water to pouring your first cup — takes about 8 to 12 minutes. The actual immersion brewing phase in the top chamber is only 60 to 90 seconds. Most of the total time goes toward heating the water and waiting for it to rise. Using pre-heated water from a kettle can cut 2 to 3 minutes off the total.
Is siphon coffee stronger than drip or French press coffee?
Not necessarily in terms of caffeine. Strength depends mostly on your coffee-to-water ratio, which you control regardless of the brewing method. What siphon coffee does differently is deliver more flavor clarity. You’ll taste individual notes more distinctly — fruit, chocolate, nuts, florals — because the brewing process extracts very evenly and the filter removes sediment. It can taste more intense because the flavors are so defined.
Can I use pre-ground coffee in a siphon brewer?
You can, but you’ll notice a significant difference compared to freshly ground beans. Pre-ground coffee starts losing volatile aromatic compounds within minutes of grinding. Since the siphon is designed to highlight those exact flavor details, stale grounds will give you a flat, underwhelming cup. If you don’t own a grinder, you can still get decent results — but investing in even a basic hand coffee grinder will dramatically improve your siphon experience.
Are siphon brewers hard to clean?
The glass chambers are actually easy to clean — warm water and a soft brush after each use. The real maintenance commitment is the cloth filter. It needs rinsing, proper storage in water, and periodic replacement. If that sounds like too much work, paper filters are a low-maintenance alternative that still produce excellent results.
Is siphon coffee worth the effort compared to simpler methods?
That depends entirely on what you value. If you just need a solid cup of coffee and you’re happy with your current method, a siphon won’t fundamentally change your life. But if you enjoy exploring coffee flavors, experimenting with brewing variables, and you appreciate the ritual and craft of making coffee — yes, it’s absolutely worth it. There’s something genuinely satisfying about watching the drawdown happen and knowing you orchestrated it.
Your Next Step
Mastering siphon coffee isn’t about memorizing a recipe. It’s about understanding the relationship between heat, water, grind, and time — and then paying attention to what your cup tells you after each brew. Start with the baseline recipe in this guide, taste critically, and make one small change at a time.
Your first few brews will teach you more than any article can. You’ll learn how your specific grinder handles medium grinds, how your heat source behaves, and what drawdown speed feels right. Within five or six brews, you’ll have a feel for the process that makes it intuitive rather than technical.
Pick up a bag of single-origin beans you’ve been curious about, set aside 15 unhurried minutes, and give it a go. That first clean, bright, flavor-packed siphon cup has a way of making you wonder why you didn’t try this sooner.