Your grinder just broke. Or maybe you’re at a vacation rental, staring at a bag of whole beans and nothing to grind them with. Either way, your morning coffee is in danger — and that’s not a situation anyone handles gracefully.
Here’s the good news: people were grinding coffee beans long before electric burr grinders existed. A quick look through your kitchen drawers will probably turn up at least two or three tools that can get the job done. They won’t all produce the same results, and some methods take a bit of muscle, but every one of them will get you from whole bean to a drinkable cup.
This guide walks you through seven practical ways to grind coffee beans without a grinder, plus tips on matching your grind to your brew method so you don’t end up with a bitter, over-extracted mess or a weak, watery cup.
Why Grind Size Actually Matters
Before you grab a rolling pin and start smashing beans, let’s talk about why grind size is worth caring about — even when you’re improvising.
Coffee extraction depends on how much surface area the water can reach. Fine grounds expose more surface area, so water pulls flavor out quickly. Coarse grounds do the opposite — they slow extraction down and give you a mellower cup.
Use the wrong grind for your brew method and you’ll notice right away. Too fine in a French press? You’ll get a sludgy, bitter brew. Too coarse for a Moka pot? Expect something thin and sour.
The methods below give you different levels of control over particle size. Some naturally produce a coarser grind, while others can go surprisingly fine. I’ll point out which brew methods each one works best with so you can match things up. If you’re curious about how grind size affects a specific brewer, the guide on French press grind size breaks it down in detail.
Method 1: The Blender
A standard kitchen blender is probably the closest substitute for a burr grinder you already own. Most blenders have blades spinning at 10,000+ RPM, which is more than enough to chop through roasted coffee beans.
How to Do It
Add about a quarter cup of beans at a time — small batches are key here. Use short pulses of 2-3 seconds each, shaking the blender gently between pulses to redistribute the beans. After 8-10 pulses, check the consistency. You’re looking for grounds that feel like coarse sand between your fingers for most brew methods.
Pro Tip: Don’t hold the blend button down continuously. That creates heat from friction, which can actually start cooking the oils in your beans and give you a flat, stale-tasting cup. Pulse, pause, pulse. Think of it like tapping a car horn rather than leaning on it.
What Grind This Works Best For
Blenders tend to produce a medium to medium-coarse grind with some inconsistency. That makes them a decent match for drip coffee makers or a pour-over setup. If you own a drip coffee maker or a pour-over dripper, this is your go-to improvised method.
Watch Out For
Coffee oils can linger in blender gaskets and plastic components. Wash your blender immediately and thoroughly after grinding, or your next morning smoothie might taste like a dark roast.
Method 2: The Mortar and Pestle
If you want the most control over your grind without an actual grinder, a mortar and pestle is hard to beat. It’s also the most traditional method on this list — Turkish coffee has been ground this way for centuries, and some specialty coffee shops in Istanbul still use oversized brass mortars today.
How to Do It
Add a small handful of beans (about two tablespoons) to the mortar. Start by pressing down firmly with the pestle to crack the beans rather than smashing them. Once they’re broken into pieces, switch to a circular grinding motion, pressing the pestle against the sides of the mortar.
This is where patience pays off. You can genuinely achieve a fine grind with this method — even fine enough for Turkish coffee if you keep at it for 5-10 minutes. For a French press, you’ll only need a minute or two of work.
What Grind This Works Best For
Everything, honestly. The mortar and pestle gives you the widest range of grind sizes of any non-grinder method. Coarse for cold brew, medium for drip, fine for espresso-style or Moka pot brewing — it’s all possible with enough elbow grease.
Did You Know? A mortar and pestle actually crushes beans rather than slicing them, which is similar to how a burr grinder works. That’s why it produces a more consistent grind than blade-based methods. The flavor difference is noticeable.
Watch Out For
Beans like to escape. Cover the top of the mortar loosely with your hand or a towel while cracking, especially during those first few presses when whole beans tend to bounce out.
Method 3: The Rolling Pin
This one works better than most people expect. A rolling pin gives you a satisfyingly hands-on way to grind beans, and you probably already have one in a drawer somewhere.
How to Do It
Place your beans in a sturdy zip-lock freezer bag — not the thin sandwich bags, which will tear. Press out as much air as possible before sealing. Lay the bag flat on a cutting board or countertop.
Start by pressing down on the beans with the rolling pin to crack them. Don’t roll yet. Once they’re all cracked into pieces, begin rolling back and forth with firm, even pressure, working from one end of the bag to the other.
Every 30 seconds or so, shake the bag to redistribute the grounds and check your progress. You’re aiming for uniform-looking pieces without too many large chunks mixed in with fine powder.
What Grind This Works Best For
The rolling pin naturally produces a medium to medium-coarse grind. That’s a solid match for drip coffee, a Chemex pour-over, or a French press. Getting a truly fine grind this way takes a lot of time and effort, so I wouldn’t recommend it if you’re brewing espresso.
Watch Out For
Apply pressure evenly. If you bear down harder on one side, you’ll end up with a mix of powder and chunks — and that inconsistency leads to uneven extraction. Your cup will taste both bitter and sour at the same time, which is somehow worse than either one alone.
Method 4: A Knife (the Flat Side)
Chefs crush garlic with the flat of a knife all the time. You can do the same thing with coffee beans, and it works surprisingly well.
How to Do It
Use a large chef’s knife or a wide butcher’s knife — you want maximum surface area. Place a small number of beans on a cutting board. Lay the flat side of the blade over the beans and press down firmly with the heel of your palm. You’ll feel the beans crack and crumble under the blade.
Once cracked, you can rock the blade back and forth over the pieces, pressing down as you go. This is more “crushing” than “cutting,” which actually produces better results for coffee extraction.
What Grind This Works Best For
This method gives you a coarse to medium grind, which makes it a natural fit for French press brewing. If you’ve been debating between French press and pour-over methods, the French press is more forgiving with a less-than-perfect grind — so it’s a great match for knife-crushed beans.
Watch Out For
Safety first. Always press down on the flat of the blade, never the edge. Keep your fingers behind the spine of the knife, not wrapped around the sides. If you’re not comfortable with knife skills, skip this one and use the rolling pin method instead.
Method 5: A Food Processor
A food processor works on the same principle as a blender but gives you a bit more room to work with. The wider bowl means beans spread out more and get chopped more evenly.
How to Do It
Add up to half a cup of beans to the processor bowl. Use the pulse function in 2-3 second bursts, stopping to scrape down the sides between pulses. After every few pulses, open the lid and check your grind by rubbing some between your fingers.
Most food processors get you to a medium grind in about 10-15 pulses. Going finer than that is tricky because the blade design tends to create a lot of “fines” (powdery dust) while larger pieces remain stubbornly chunky.
What Grind This Works Best For
Medium grind — great for drip coffee machines. If you’re using one of the best automatic drip coffee makers, food processor grounds will pair nicely. Also works for cold brew, where a coarser, slightly uneven grind is actually fine since the long steep time smooths things out.
Watch Out For
Just like with a blender, heat is the enemy. Long continuous blending creates friction, and that friction steals volatile aromatic compounds from your grounds before the water even touches them. Keep it to short pulses and you’ll preserve much more flavor.
Method 6: A Hammer or Meat Tenderizer
Look, it’s not elegant. But it works, and sometimes function matters more than form — especially before your first cup of coffee.
How to Do It
Place beans in a freezer bag (doubled up if you’re feeling cautious) or wrap them in a clean kitchen towel. Set them on a hard, stable surface. A cutting board on a countertop works better than directly on a counter, which can crack or chip.
Tap — don’t smash — with the flat side of a meat tenderizer or the head of a hammer. Start gently to crack the beans, then continue with moderate force. Check your progress frequently by opening the bag.
The key word here is tap. You’re not driving a nail. If you go too hard, you’ll pulverize some beans into dust while others fly out of the bag entirely. Controlled, rhythmic taps get you a much more even result.
What Grind This Works Best For
This produces a coarse, irregular grind that’s best suited for cold brew or French press. Don’t try to get a fine grind this way — you’ll just make a mess and end up frustrated.
If you’re making cold brew, you could check out some top-rated cold brew coffee makers that work beautifully with a coarse grind.
Watch Out For
Noise. If you’re in an apartment at 6 AM, hammering coffee beans is a fast way to meet your downstairs neighbor under less-than-ideal circumstances. Also, always work on a stable, hard surface — hammering on a wobbly table is asking for trouble.
Method 7: A Hand Mincer or Garlic Press
This is the least common suggestion you’ll find, but it deserves mention because it actually produces a reasonably consistent grind for small quantities.
How to Do It
If you have a hand-cranked meat mincer, run the beans through on the coarsest setting, then pass them through a second time for a finer result. It’s slow going, but the consistency is surprisingly decent.
A garlic press can handle a few beans at a time in a pinch. You’ll only get enough grounds for a single cup, and the effort-to-reward ratio is steep, but it works for a true emergency. Load 4-5 beans, squeeze, empty, repeat.
What Grind This Works Best For
A hand mincer gives you a medium grind that’s good for drip coffee. A garlic press tends to produce more of a medium-fine result, which can work for a Moka pot or an AeroPress.
Matching Your Improvised Grind to Your Brew Method
Getting the grind “close enough” matters more than you might think. Here’s a quick reference to keep you on track.
Coarse grind (chunky, like sea salt): French press, cold brew. Best achieved with a rolling pin, hammer, or mortar and pestle with minimal grinding time.
Medium grind (like regular sand): Drip coffee, pour-over, siphon brewer. A blender or food processor on pulse mode works well here. If you’ve ever been curious about siphon coffee brewing, a medium grind is exactly what you’d need.
Fine grind (like table salt or finer): Espresso, Moka pot, AeroPress, Turkish. Only the mortar and pestle can reliably get you here without an actual grinder. Be prepared to put in some work.
Here’s a reality check: none of these methods will match the consistency of a good burr grinder. And that’s okay. Your coffee will still taste good — just maybe not perfect. If you find yourself grinding without a grinder more than once or twice, it’s probably worth investing in even a basic hand coffee grinder, which typically costs between $20 and $50 and fits in a travel bag.
Tips to Get Better Results No Matter Which Method You Use
A few universal principles apply regardless of whether you’re using a mortar and pestle or a meat tenderizer.
Start with freshly roasted beans. Stale beans are harder and more brittle, which makes them shatter into uneven pieces. Fresh beans (roasted within the last 2-4 weeks) crack more predictably. Storing them properly helps — keeping beans in an airtight container away from heat and light makes a big difference, and there’s a helpful guide on proper coffee bean storage if you want the full breakdown.
Work in small batches. Every method on this list performs better with fewer beans at a time. A quarter cup is a good starting point. Yes, it takes longer. But the grind is more even, and even extraction means better flavor.
Sift your grounds if possible. If you have a fine mesh strainer, pour your grounds through it after grinding. The big chunks that stay in the strainer can go back for another round of grinding. The stuff that passes through is ready to brew. This simple extra step dramatically improves consistency.
Don’t over-grind to compensate. It’s tempting to keep going until everything looks uniform. But the problem is that the fine particles keep getting finer while the big pieces slowly break down. You end up with a mix of dust and acceptable grounds. A better approach: grind to a medium level, sift out the big pieces, and accept that some irregularity is just part of the deal.
Adjust your brew time. If your grind is coarser than ideal for your brew method, let the coffee steep or brew a little longer. Coarser grounds need more contact time with water to extract properly. For a French press, that might mean steeping for 5-6 minutes instead of the usual 4.
When It’s Worth Buying a Grinder Instead
There’s a line between “fun hack for an occasional situation” and “this is now my daily routine.” If you’re grinding beans without a grinder more than a couple of times a month, you’re spending time and effort that a $25 hand grinder could save you.
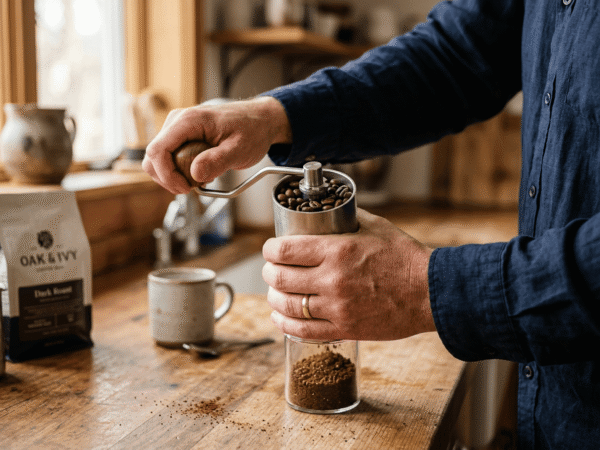
Hand grinders — also called manual burr grinders — are small, portable, and produce a dramatically more consistent grind than any kitchen workaround. They’re popular with travelers and campers for exactly this reason. A good one fits in a backpack, doesn’t need electricity, and grinds enough for two cups in about 60-90 seconds.
For home use, even a budget electric grinder outperforms every method in this article. You don’t need to spend a fortune. The jump in coffee quality from a $30 blade grinder to whole beans ground with a kitchen knife is massive — far bigger than the jump from a $30 grinder to a $200 one.
FAQ
Can I use a blender to grind coffee beans?
Yes, a blender works well for grinding coffee beans. Use short 2-3 second pulses rather than continuous blending, and only grind about a quarter cup at a time. This prevents overheating and gives you a more even grind. Blenders produce a medium to medium-coarse consistency, which is good for drip coffee and pour-over methods.
What’s the best way to grind coffee beans without a grinder?
A mortar and pestle gives you the most control and the widest range of grind sizes. You can go from coarse (French press) to very fine (Turkish coffee) depending on how long you grind. A blender or food processor is faster and easier, though less precise. The best method depends on what you have available and which brew method you’re using.
Can I grind coffee beans the night before?
You can, but it’s not ideal. Ground coffee starts losing flavor within 15-30 minutes of grinding because the increased surface area speeds up oxidation. If you grind the night before, store your grounds in an airtight container and expect a noticeable — though not dramatic — drop in freshness. Grinding right before brewing always gives the best results.
How fine should I grind coffee beans for a French press?
For a French press, you want a coarse grind — roughly the texture of sea salt or raw sugar. Too fine and the grounds will slip through the mesh filter, leaving sediment in your cup and creating a muddy, over-extracted taste. A rolling pin, hammer, or a few quick passes with a mortar and pestle can all produce a coarse enough grind for a good French press.
Is grinding coffee beans by hand worth the effort?
For an occasional cup, absolutely. The flavor difference between freshly ground beans and pre-ground coffee is significant — even if the grind isn’t perfectly uniform. Studies on coffee flavor, including research published in the Journal of Food Science, consistently show that grinding just before brewing preserves more of the 800+ volatile aromatic compounds that give coffee its complex taste. So yes, a slightly uneven hand-ground cup will almost always taste better than perfectly consistent pre-ground that’s been sitting in a bag for weeks.
The next time you find yourself with whole beans and no grinder, don’t panic — and definitely don’t drive to the store for pre-ground. Grab your rolling pin, your blender, or even that mortar and pestle collecting dust on a shelf, and put it to work.
Your coffee might not look like something from a specialty café, but it’ll taste like real, freshly ground coffee — because that’s exactly what it is. And once you’ve experienced that difference, you’ll probably find yourself eyeing hand grinders online before the day is over.