The percolator was supposed to be dead. Drip machines, pod brewers, and pour-over setups were supposed to bury it for good. And yet, stovetop coffee percolators keep selling — year after year — because nothing else produces quite the same bold, full-bodied cup. If your grandparents swore by percolator coffee, there’s a reason. The brewing method forces hot water through ground coffee repeatedly, extracting deep flavor that gentler methods can’t replicate.
But here’s the thing: not all stovetop percolators are built the same. Some are flimsy and overheat your coffee into bitter sludge. Others are built to last decades and produce a surprisingly smooth brew. You’re here because you want to know which ones are actually worth your money, and that’s exactly what we’ll cover — along with how to use one properly so you don’t end up disappointed.
Why Stovetop Percolators Still Have a Loyal Following
You might wonder why anyone would choose a stovetop percolator over a modern drip coffee maker or a sleek pour-over setup. It’s a fair question. The answer comes down to a few things that other brewing methods simply can’t match.
Strength and body. Percolated coffee is bold. The continuous cycling of water through the grounds produces a heavier, more intense cup than a single-pass drip machine. If you like your coffee to actually taste like coffee — not flavored water — a percolator delivers.
No electricity needed. A stovetop percolator works on any heat source: gas, electric, induction (if it’s stainless steel), campfire, even a portable camp stove. That makes it one of the most versatile brewing devices you can own. If you’re curious about options designed specifically for the outdoors, our guide to the best camping coffee percolators goes deeper on that angle.
Durability. A well-made stainless steel percolator has essentially no parts that break. No carafe to shatter, no electronics to fail, no paper filters to run out of. People pass these things down through generations.
Capacity. Most stovetop percolators brew 8 to 12 cups at once. That makes them ideal for households with multiple coffee drinkers or for hosting guests. Try making 12 cups of pour-over sometime and you’ll appreciate the simplicity.
If you’ve been comparing brewing methods and aren’t sure where a percolator fits, our breakdown of percolator vs. French press might help you see the differences clearly.
How a Stovetop Coffee Percolator Actually Works
Before we get to specific products, it helps to understand the mechanics — because knowing how a percolator works will make you better at using one.
A stovetop percolator has two chambers. The bottom chamber holds water. A vertical tube runs from the bottom up to the top chamber, which holds a perforated basket filled with ground coffee.
When you place the percolator on a heat source, the water at the bottom heats up. As it nears boiling, it rises through the tube and sprays over the coffee grounds in the upper basket. The brewed coffee then drips back down into the bottom chamber through the perforations. This cycle repeats for several minutes — the water keeps rising, passing through the grounds, and dripping back down.
That’s the key difference between percolation and other brewing methods. Drip coffee passes water through grounds once. A French press steeps grounds in still water. A percolator recirculates the brew, which is why the resulting coffee is stronger and more extracted.
Quick Fact: The coffee percolator was invented by a Parisian tinsmith named Joseph-Henry-Marie Laurens around 1819, though the design was refined significantly in the decades that followed. By the mid-20th century, percolators were the dominant home brewing method in the United States.
The tradeoff? If you leave it on too long or use too high a heat, you’ll over-extract the grounds and get bitter coffee. That’s where technique matters — and we’ll cover that shortly.
What to Look for in a Stovetop Coffee Percolator
Shopping for a stovetop percolator isn’t complicated, but there are a few details that separate a good one from a bad one. Here’s what actually matters.
Material
Stainless steel is the gold standard. It’s durable, doesn’t affect the taste of your coffee, resists corrosion, and works on induction cooktops. Most high-quality stovetop percolators are made from 18/8 stainless steel (also labeled 304 stainless), which is food-grade and rust-resistant.
Aluminum percolators are lighter and cheaper, but they can impart a slight metallic taste over time — especially with acidic coffee. They also don’t work on induction stoves. Aluminum models are fine for camping or occasional use, but for daily home brewing, stainless steel is the better investment.
Enamel-coated steel percolators look great — think vintage speckled camp pots — but the enamel can chip over time, and chipped enamel can expose bare metal to your coffee.
Capacity
Stovetop percolators typically come in 4-cup, 8-cup, and 12-cup sizes. Keep in mind that a “cup” in percolator terms is usually 5 ounces, not the 8 to 12 ounces most of us actually drink. So an “8-cup” percolator makes about 40 ounces — roughly three to four normal-sized mugs.
Think about how much coffee you brew at once. A 12-cup model is great for a family or for entertaining, but if you’re brewing for one or two people, a 4 or 8-cup size will be more practical.
Glass Knob vs. Opaque Lid
Many percolators feature a transparent glass knob on the lid. This lets you see the coffee as it percolates — you can watch the color darken and judge when the brew is strong enough. It’s not strictly necessary, but it’s genuinely useful, especially while you’re learning how to time your brew.
Handle Design
This is one of those details people overlook until they burn themselves. A good stovetop percolator has a handle that stays cool during brewing. Look for handles made of heat-resistant plastic, Bakelite, or silicone-coated metal. An all-metal handle on a stovetop percolator will get hot — guaranteed.
Basket and Filter Quality
The perforated basket should fit snugly and have fine enough holes to keep grounds out of your coffee. Some models include a metal spreader plate on top of the basket that distributes the water evenly over the grounds. This small feature makes a noticeable difference in extraction quality.
The Best Stovetop Coffee Percolators Worth Buying
After spending serious time evaluating what’s available, here are the stovetop percolators that consistently earn praise from both everyday users and coffee enthusiasts. We looked at build quality, ease of use, brew quality, and long-term durability.
Farberware Classic 8-Cup Stainless Steel Percolator
Farberware has been making percolators since the early 1900s, and their classic stovetop model is still one of the best-selling percolators on the market. The 8-cup version hits the sweet spot for most households.
It’s made from polished stainless steel with a permanent filter basket — no paper filters needed. The glass knob lets you monitor your brew in real time. The handle is sturdy and stays relatively cool, though you’ll want a pot holder if you’re brewing over high heat.
What stands out: Consistent brew quality, wide availability of replacement parts, and a price point that’s hard to beat — typically under $30. It’s not fancy, but it works exactly like it should.
Worth noting: The bottom is thin stainless steel, so you need to keep the heat at medium or lower to avoid scorching. It’s not induction-compatible in some versions, so check the product description if that matters to you.
Presto 6-Cup Stainless Steel Percolator
Presto is better known for their electric percolators, but their stovetop model is a sleeper hit. The 6-cup size is ideal for one or two people who want a quick weekday brew without wasting coffee.
The build quality is solid — 18/8 stainless steel throughout, including the basket and stem. It has a simple, no-nonsense design with a glass knob indicator and a Bakelite handle.
What stands out: The smaller size heats up fast, so you can have coffee ready in about 5 to 7 minutes. The narrow profile means it doesn’t take up much space on your stove or in your cabinet.
Worth noting: If you need to brew for a crowd, this isn’t the one. But for daily use with a small household, it’s just right.
Coletti Bozeman 9-Cup Percolator
Coletti makes percolators specifically designed for outdoor use, but the Bozeman works just as well on a home stove. The 9-cup capacity is slightly larger than the standard 8-cup, which gives you a little extra without going up to a bulky 12-cup model.
It’s made from surgical-grade stainless steel, and the build feels noticeably heavier and more substantial than budget options. The glass knob is heat-resistant, and the handle has a textured grip.
What stands out: The thicker steel distributes heat more evenly, which reduces the chance of scorching or uneven extraction. It also works well on induction cooktops, which not all percolators can claim.
Worth noting: It’s pricier than the Farberware — usually around $35 to $45. If you plan to use your percolator at home and while camping, this one does double duty well.
GSI Outdoors Glacier 8-Cup Enamelware Percolator
If aesthetics matter to you as much as function, this enamelware percolator has that classic speckled camp look that doubles as kitchen décor. It’s made from steel with a blue enamel coating and a glass percolation knob.
The brew quality is good, though not quite as consistent as a thick-walled stainless steel model. The enamel keeps the coffee from touching bare metal, so there’s no metallic taste.
What stands out: The visual appeal is genuinely charming — it looks like something from a 1950s cabin. It’s lightweight and easy to handle.
Worth noting: Enamel can chip if you drop it or bang it against something hard. Once chipped, the exposed steel underneath can rust. Treat it gently and it’ll last years. If you’re looking for something specifically built to handle rougher conditions, our roundup of best camping coffee percolators has tougher options.
Tops Rapid Brew 12-Cup Percolator
For anyone who regularly brews coffee for a large group — think family gatherings, brunch parties, or office settings — the Tops Rapid Brew 12-cup is worth a look. It’s made from stainless steel with a wide base that heats quickly and efficiently.
The 12-cup capacity makes roughly 60 ounces, enough to fill six standard mugs. The basket is well-designed with a fine perforation pattern that keeps even medium-ground coffee from leaking through.
What stands out: Raw capacity. If you need a lot of coffee without the fuss of multiple brew cycles, this handles it. The wide base also makes it stable on larger burners.
Worth noting: The bigger size means it takes longer to heat up and percolate — plan on 10 to 15 minutes for a full pot. The handle can get warm with extended use, so keep a towel handy. If you’d rather let electricity do the work for large batches, you might prefer an electric coffee percolator instead.
How to Brew Great Coffee in a Stovetop Percolator
Owning a great percolator is only half the equation. Technique matters — probably more than the specific model you buy. Here’s how to get consistently good results.
Start with the Right Grind
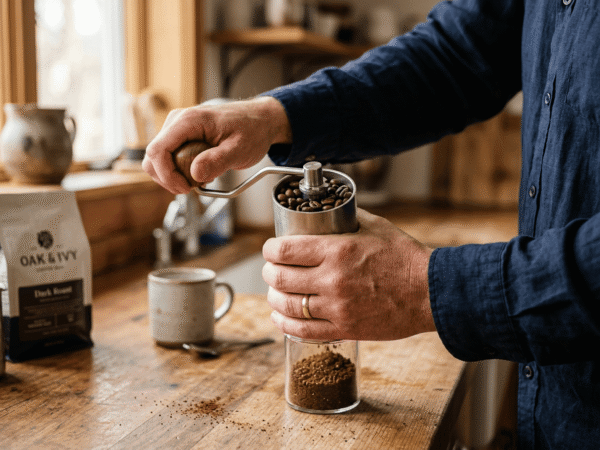
This is where most people go wrong. You want a coarse grind for percolator coffee. Think roughly the size of sea salt. If you use a fine or even medium grind, the coffee will over-extract during the repeated cycling and turn bitter. Fine grounds can also slip through the basket perforations and make your coffee gritty.
If you’re grinding your own beans, a burr grinder gives you more control over consistency. If you want to learn more about choosing the right grind for different methods, our piece on French press grind size covers grind principles that apply broadly — the percolator uses a similar coarseness.
Use the Right Ratio
A good starting point is one tablespoon of coarsely ground coffee per cup of water (remembering that a percolator “cup” is 5 ounces). So for an 8-cup percolator, you’d use about 8 tablespoons — or half a cup — of ground coffee.
Adjust from there based on your taste. Like it stronger? Add an extra tablespoon or two. Prefer a lighter cup? Pull back slightly.
Control Your Heat
Here’s the real secret to percolator coffee that doesn’t taste burnt: keep the heat at medium or medium-low. You want the water to percolate gently — a slow, steady “perk” every few seconds. If you see it bubbling violently or hear aggressive sputtering, your heat is too high.
Water that’s too hot (above roughly 205°F) will scald the grounds and extract harsh, bitter compounds. A gentle percolation keeps the water in the ideal 195°F to 205°F range.
Watch the Timing
Most stovetop percolators produce the best results with a brew time of 7 to 10 minutes once percolation starts. Shorter than that and the coffee will be weak and watery. Much longer and it’ll turn bitter and over-extracted.
That glass knob on the lid is your best friend here. Watch the color of the liquid as it bubbles up. When it reaches a rich amber-brown, you’re in the sweet spot. If it looks almost black, you’ve gone too long.
Remove From Heat Immediately
Once your brew time is up, take the percolator off the burner. If you leave it on the heat, the coffee will keep cycling and extracting, pushing it toward bitterness. If you want to keep it warm, pour it into an insulated carafe. If you’re looking for a great one, we’ve got a guide to the best thermos for coffee that’ll keep your percolated brew hot for hours without cooking it further.
Pro Tip: Remove the basket and stem as soon as you take the percolator off heat. This stops any residual dripping from the wet grounds from making the coffee more bitter.
Common Mistakes That Ruin Percolator Coffee
Most of the complaints people have about percolator coffee come down to user error, not the brewing method itself. Here are the mistakes you want to avoid.
Using too fine a grind. We already covered this, but it bears repeating because it’s the single most common mistake. Pre-ground coffee from the store is usually a medium grind designed for drip machines. That’s too fine for a percolator. Either buy coarse-ground coffee or grind your own. If you don’t own a grinder yet, we have a guide on how to grind coffee beans without a grinder that covers some creative options.
Cranking up the heat. High heat doesn’t make coffee faster — it makes coffee bitter. Always keep it at medium.
Brewing too long. Ten minutes is plenty. Fifteen minutes and you’re in danger territory. Twenty minutes and you might as well be drinking liquid charcoal.
Using stale coffee. Percolation amplifies the character of your beans. If those beans are stale, you’re amplifying staleness. Use freshly roasted coffee and store it properly. Our coffee bean storage guide has practical tips for keeping your beans fresh longer.
Not cleaning the percolator. Coffee oils build up inside the tube, basket, and pot walls. Over time, these oils go rancid and add off-flavors to your brew. Wash your percolator after every use with warm, soapy water. Once a month, run a cycle with a mixture of water and white vinegar to dissolve any stubborn buildup.
Stovetop Percolator vs. Other Brewing Methods
You might be weighing a stovetop percolator against other options. Here’s a quick, honest comparison.
Percolator vs. drip coffee maker. A drip machine is more convenient — fill it, press a button, walk away. But a percolator gives you stronger, bolder coffee and doesn’t require electricity or paper filters. If convenience is your priority, check out our best drip coffee maker picks. If flavor intensity is what you’re after, the percolator wins.
Percolator vs. French press. Both make strong coffee, but they do it differently. The French press steeps grounds in water and produces a rich, slightly oily cup. The percolator recirculates water through grounds and produces a cleaner but more intensely extracted cup. They’re different experiences, and many coffee lovers own both. Our percolator vs. French press comparison breaks this down in detail.
Percolator vs. moka pot. A moka pot (sometimes called a stovetop espresso maker) uses pressure to force water through fine grounds, producing a concentrated, espresso-like shot. A percolator uses gravity and cycling to produce a larger volume of strong brewed coffee. They’re not interchangeable — a moka pot gives you 2 to 4 ounces at a time, while a percolator makes full pots. If the moka pot interests you, our French press vs. moka pot article covers how it stacks up against another immersion method.
Who Should (and Shouldn’t) Buy a Stovetop Percolator
A stovetop percolator is a great fit if you prefer bold, strong coffee and don’t mind spending 10 minutes actively brewing. It’s also a smart choice if you want a backup brewer that works during power outages, or something versatile enough to take camping.
It’s probably not for you if you prefer light, nuanced, single-origin coffees where you want to taste delicate floral or fruity notes. Percolation tends to flatten those subtleties. For that kind of coffee, a pour-over method like a Chemex or V60 will serve you better.
It’s also not the best pick if you want a totally hands-off experience. A drip coffee maker with a timer or an electric percolator is more set-it-and-forget-it.
Did You Know? During World War II, percolators were the preferred brewing method for U.S. military field kitchens because they were durable, required no electricity, and could make coffee for large groups quickly. The military’s standardized coffee — brewed in large percolators — is part of why American coffee culture historically favored strong, straightforward brews.
FAQ
How long should you percolate coffee on a stove?
Aim for 7 to 10 minutes of active percolation after you first see the water start to bubble up through the glass knob. Shorter than 7 minutes tends to produce weak coffee, while anything over 10 minutes risks bitterness from over-extraction. Keep the heat at medium and watch the color of the brew through the knob — when it’s a consistent dark amber, you’re done.
Can you use regular ground coffee in a percolator?
You can, but the results won’t be ideal. Most pre-ground coffee is a medium grind meant for drip machines. In a percolator, medium-ground coffee tends to over-extract because the water passes through the grounds multiple times. You’ll get better results with a coarse grind — about the consistency of raw sugar or sea salt. Many grocery stores sell “percolator grind” or “coarse grind” options if you don’t have a grinder at home.
Does a stovetop percolator work on an induction cooktop?
It depends on the material. Stainless steel percolators (specifically those with a magnetic grade of steel on the base) will work on induction cooktops. Aluminum and enamelware percolators typically won’t, because induction cooking requires a magnetic metal. If induction compatibility is important to you, check the product specifications before buying — brands like Coletti and Farberware offer induction-ready models.
Is percolator coffee stronger than drip coffee?
Yes, generally. Because the water cycles through the coffee grounds multiple times, percolated coffee extracts more soluble compounds than a single-pass drip machine. The result is a noticeably stronger, more full-bodied cup. The exact strength depends on your grind, coffee-to-water ratio, and brew time, but all other variables being equal, percolator coffee will be bolder.
How do you keep percolator coffee from tasting bitter?
Three things will prevent bitterness: use a coarse grind, keep your heat at medium (never high), and don’t brew longer than 10 minutes. Remove the percolator from the heat source as soon as the brew reaches your desired strength, and take the basket and stem out immediately so grounds don’t continue dripping into the pot.
Your Next Cup Is Waiting
A good stovetop percolator is one of the simplest, most reliable coffee makers you can own. No pods, no programming, no expensive filters — just water, heat, and ground coffee. The Farberware Classic remains the best all-around value for most people, while the Coletti Bozeman is worth the upgrade if you want thicker steel and induction compatibility. And if you’re brewing for a crowd, the Tops Rapid Brew handles volume without breaking a sweat.
Pick the size that fits your household, grab some quality coarse-ground beans, and give yourself a week to dial in the timing and heat. Once you find your sweet spot, you’ll understand why this 200-year-old brewing method never actually went away.