There’s something almost magical about that first sip of hot coffee at a campsite. The air is cool, the fire’s crackling, and you’re miles from the nearest barista. But here’s the thing — instant coffee packets don’t do that moment justice. A camping coffee percolator does.
Percolators have been brewing campfire coffee for over a century, and there’s a reason they’ve stuck around. They’re tough, they’re simple, and they make a strong, full-bodied cup without needing electricity or paper filters. Whether you’re car camping with friends or heading deep into the backcountry, the right camping coffee percolator can turn your morning ritual from a chore into a highlight.
The challenge? There are dozens of options out there, and they’re not all created equal. Some are flimsy. Some are heavy. Some make coffee that tastes like it was brewed in a tin can — because, well, it basically was.
This guide walks you through everything you need to pick the right one, use it properly, and actually enjoy your coffee under the open sky.
How a Camping Percolator Actually Works
If you’ve never used a percolator, the concept is beautifully simple. There are no batteries, no pods, no apps. Just heat, water, and ground coffee.
A percolator has a few basic parts: a pot, a vertical tube (called the stem), and a basket that holds the coffee grounds near the top. You fill the pot with water, place the grounds in the basket, and set the whole thing over your heat source — a campfire, a camp stove, or even a bed of hot coals.
As the water heats up, it rises through the tube and drips over the grounds. The brewed coffee then flows back down into the pot. This cycle repeats over and over, which is why percolator coffee tends to be bold and strong. The water passes through the grounds multiple times during the brew.
Pro Tip: The key to great percolator coffee is controlling the heat. You want a gentle, steady bubble — not a rolling boil. Too much heat over-extracts the grounds and makes your coffee taste bitter and harsh.
You can hear the percolator working. It makes that rhythmic “perk-perk-perk” sound that old-timers associate with mornings at camp. Once you hear it, reduce the heat and let it perk for about 7 to 10 minutes. That’s it. Coffee’s ready.
If you’re curious how percolators stack up against other manual brewing methods, our percolator vs. French press comparison breaks down the differences in flavor, convenience, and ease of use.
What to Look for in a Camping Percolator
Not every percolator belongs on a trail. The one sitting on your grandmother’s kitchen counter probably isn’t the one you want to lug through the woods. Camping percolators need to meet some specific demands, so here’s what matters most.
Material and Durability
The three most common materials are stainless steel, aluminum, and enamelware (steel coated in a porcelain-like enamel).
Stainless steel is the gold standard for durability. It resists dents, doesn’t corrode, and handles the abuse of outdoor life. It’s heavier than aluminum, but for car camping, the weight difference is negligible. If you’re buying one percolator and want it to last a decade, stainless steel is the move.
Aluminum is lighter and heats up faster, which makes it popular with backpackers and weight-conscious campers. The downside? It can dent more easily, and some people notice a faint metallic taste — especially with cheaper models. Anodized aluminum handles this better than raw aluminum.
Enamelware percolators have that classic, nostalgic campfire look — usually blue or white with dark speckles. They’re charming, but the enamel coating can chip if you drop them or bang them around in a pack. A chipped enamel pot can expose bare metal, which eventually leads to rust. They’re great for car camping and cabin trips where they won’t take a beating.
Capacity
Camping percolators typically range from 3-cup models (perfect for solo trips or couples) up to 12-cup versions built for group camping.
Think honestly about how many people you’re brewing for. A solo backpacker hauling a 12-cup percolator is carrying dead weight. A group of six sharing a 3-cup pot will spend the entire morning waiting for refills.
Here’s a rough guide: one “cup” on a percolator is about 5 to 6 ounces, not a full mug. So a “9-cup” percolator actually makes about four to five generous mugs of coffee. Keep that in mind when you’re sizing up your options.
Handle Design
This one gets overlooked constantly, and it shouldn’t. You’re going to be grabbing this thing off a campfire or a hot stove. A percolator with a metal handle and no heat protection will burn you. Look for models with heat-resistant handles — silicone grips, plastic-coated handles, or bail handles (the wire arch-style handles) that stay cool enough to grab with a camp towel.
Some percolators have a fixed side handle, while others use a bail handle that folds over the top. Bail handles are generally easier to manage over a campfire because you can hook them with a stick or a fire tool without getting too close to the flames.
Weight and Packability
For car camping, weight barely matters. You’re driving to your site, unloading, and setting up. A hefty stainless steel 9-cup percolator is perfectly fine.
For backpacking, every ounce counts. You’ll want to look at smaller aluminum models — ideally under a pound. Some ultralight campers skip the percolator entirely and go with a pour-over cone or an AeroPress, but if you want that percolator-style coffee on the trail, compact aluminum models exist that weigh around 10 to 14 ounces.
Compatibility with Heat Sources
Most camping percolators work with any heat source: propane camp stoves, wood-burning campfires, charcoal, even portable backpacking stoves. But check the base diameter. Some backpacking stoves have small burner heads, and a percolator with a wide bottom might not sit securely on them.
If you’re planning to set your percolator directly in a campfire, make sure it doesn’t have any plastic parts that could melt near the flames. All-metal construction is essential for open-fire brewing.
Top Camping Coffee Percolators Worth Considering
There’s no single “best” percolator for everyone. The right choice depends on your camping style, your group size, and how much you care about weight. Here are several standout options across different categories.
Best Overall: GSI Outdoors Glacier Stainless Percolator
GSI Outdoors has been making camping cookware for decades, and their Glacier Stainless percolator is a favorite among outdoor coffee lovers. It’s made from 18/8 stainless steel, which means it’s resistant to rust and won’t impart weird flavors to your coffee.
The 8-cup model weighs about 1.5 pounds, which is reasonable for car camping. It has a clear percolator knob on top so you can watch the coffee darken as it brews — a helpful visual cue for timing. The handle stays relatively cool, though you’ll still want a towel or glove on a hot fire.
One thing people consistently praise about this model is how well it pours. The spout is designed to minimize dripping, which sounds minor until you’ve dealt with a drippy percolator and coffee running down the outside of the pot onto your hand.
Best Budget Pick: Coleman 12-Cup Stainless Steel Percolator
Coleman’s name is practically synonymous with camping, and their 12-cup stainless steel percolator delivers solid performance at a very accessible price point — usually under $30.
It’s heavy. At nearly 2 pounds empty, you won’t want this in a backpack. But for car camping with a group, it’s hard to beat. The 12-cup capacity means you can brew enough for everyone without making multiple batches.
The construction is straightforward stainless steel with a plastic handle grip that stays cool. It works well on Coleman’s own camp stoves (no surprise there) and holds up fine over a campfire grate. It’s not fancy, but it’s reliable and affordable.
Best for Nostalgia: Coletti Bozeman Percolator
The Coletti Bozeman is an enamelware percolator that looks like it was pulled straight from a 1950s camping photograph. It comes in a classic blue speckled finish and holds 9 cups.
Despite the vintage look, Coletti has added some modern touches. The glass viewing knob lets you monitor the brew, and the basket has a finer mesh than many competitors, which means fewer grounds in your cup.
The enamel coating is relatively durable, though you should still treat it with care. Don’t toss it into a pile of gear or stack heavy items on top of it. The handle gets hot over an open flame, so you’ll need a pot holder or camp glove.
For anyone who values the campfire aesthetic as much as the coffee itself, the Bozeman is a great pick.
Best for Backpacking: Snow Peak Stainless Mini Solo Percolator
If you’re counting ounces and miles, Snow Peak’s mini solo percolator is one of the lightest options available. It brews about 3 cups (roughly two real mugs), and it’s compact enough to nest inside other cookware in your pack.
Snow Peak is a Japanese outdoor brand known for precise, minimalist design. The titanium and stainless steel construction keeps the weight under a pound while maintaining solid durability. You’ll pay more per ounce of capacity compared to larger models, but backpackers are used to that tradeoff.
The small capacity means this isn’t for groups. It’s a personal brewer for solo hikers or couples who don’t need more than a mug or two each morning.
Best Large-Group Option: Farberware Yosemite Percolator
The Farberware Yosemite series includes stovetop percolators up to 12 cups, and while they’re technically marketed as kitchen percolators, plenty of campers swear by them for car camping trips. The heavy-gauge stainless steel and solid construction make them nearly indestructible.
The permanent basket filter is easy to clean in the field, and the tight-fitting lid prevents ash and debris from getting into your coffee when brewing near a fire. The 8-cup version weighs around 1.8 pounds — manageable for a cooler or camp kitchen box.
If you already own a Farberware Yosemite for home use, there’s no reason to buy a separate camping model. Just bring the one you have. It works just as well over a camp stove as it does on your kitchen range. You might also find it interesting to explore our picks for the best stovetop coffee percolators, since many of those models pull double duty at camp.
How to Brew Great Coffee with a Camping Percolator
Owning the right percolator is only half the equation. Technique matters — probably more than you’d expect for something this simple.
Start with the Right Grind
Use a coarse grind. This is critical. Percolators don’t use paper filters, so fine grounds will slip through the basket and turn your coffee into a muddy, gritty mess. Think about the texture of raw sugar or coarse sea salt.
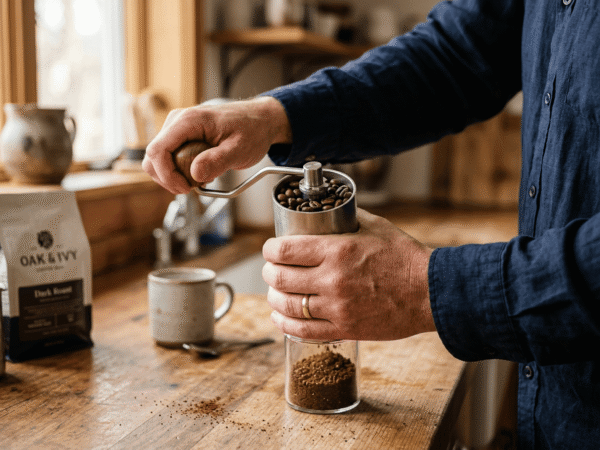
If you’re grinding beans at camp, a hand grinder with a burr mechanism gives you the most control over grind size. Pre-ground “percolator grind” or “coarse grind” coffee from the store works too, though freshly ground beans will always taste better. Our guide on using a hand coffee grinder walks through the basics if you’re new to grinding your own.
The grind size issue is actually one of the main differences between percolators and other manual brewing methods. A French press uses a similar coarse grind, but pour-over and drip methods need finer grounds. Get the grind wrong with a percolator and you’ll know it immediately.
Use the Right Coffee-to-Water Ratio
A good starting point is one tablespoon of coffee per cup of water (remember, a “cup” here is about 6 ounces). If you like your coffee stronger, bump it to a heaping tablespoon. You can always dilute strong coffee with hot water, but you can’t fix weak coffee after it’s brewed.
Some campers measure by feel after a few trips — and that’s fine. But if you’re using a percolator for the first time, stick to the tablespoon-per-cup rule and adjust from there.
Control Your Heat
This is where most people go wrong with percolator coffee. The instinct is to crank up the heat and get things boiling fast. Don’t.
You want the water to be hot enough to rise through the stem and shower over the grounds, but not so hot that it boils violently. A gentle, slow perk extracts the good flavors — caramel, chocolate, roasted notes — without pulling out the harsh, bitter compounds that come with over-extraction.
On a camp stove, use medium-low heat. Over a campfire, position the percolator near the edge of the fire or on a grate above the coals, rather than directly in the flames. You’re looking for that slow, rhythmic perk sound. If it sounds like a jackhammer, pull it back from the heat.
Timing
Once you see or hear the first perks, let it go for 7 to 10 minutes. Shorter brew times produce lighter, milder coffee. Longer brew times intensify the flavor — but go past 12 minutes and you risk a bitter, over-extracted cup.
Quick Tip: If your percolator has a glass knob, watch the color of the coffee splashing up. Light amber means it’s still early. Dark brown means it’s getting strong. Rich medium-brown is the sweet spot for most people.
Remove the Basket Before Serving
Once your coffee is done, take the basket and stem out of the pot before you pour. If you leave them in, the grounds keep steeping in the hot liquid, and your last cup will taste much stronger (and more bitter) than your first. It takes five seconds and makes a real difference.
Caring for Your Percolator in the Field
Keeping your camping percolator clean isn’t just about hygiene — it directly affects how your coffee tastes on day two, day three, and beyond. Old coffee oils go rancid quickly and leave a stale, off flavor that seeps into every brew.
After each use, rinse all parts with hot water as soon as the pot is cool enough to handle. If you have biodegradable camp soap, use a small amount on the inside of the pot and the basket. Scrub gently — especially if you’re dealing with enamelware, which can chip under aggressive scrubbing.
For stubborn coffee stains, a paste of baking soda and water works well. Some campers bring a small zip-lock bag of baking soda in their camp kitchen kit specifically for this purpose.
Dry everything thoroughly before packing it away. Moisture trapped inside a packed percolator can breed mold or, in the case of enamelware with chips, lead to rust.
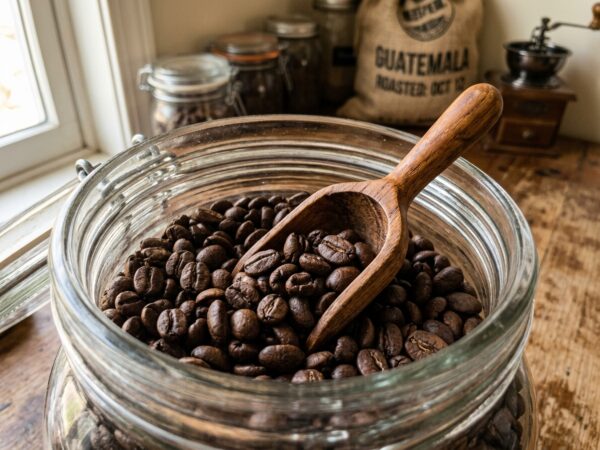
Storing your coffee beans properly matters too. If you’re bringing whole beans to camp, keep them in an airtight container away from direct sunlight and moisture. Our tips on coffee bean storage apply just as much at a campsite as they do at home — maybe more, since temperature swings outdoors can degrade beans faster.
Percolator vs. Other Camping Coffee Methods
A percolator isn’t the only way to brew coffee outdoors, so you might be wondering how it stacks up against the alternatives.
French press camping mugs have become popular in recent years. They brew excellent coffee with a full, rich body. The downside? Glass French presses are fragile (though travel versions use stainless steel or plastic), and they require you to boil water separately. A percolator is an all-in-one device — you boil the water and brew the coffee in the same vessel.
Pour-over cones are ultralight and compact, which makes them great for backpacking. But they require paper filters (one more consumable to pack), and they brew one cup at a time. For a group, that gets tedious fast.
Instant coffee is the lightest, simplest option. It’s gotten better over the years — brands like Steeped Coffee and Swift Cup make surprisingly decent instant packets. But let’s be honest: it still doesn’t taste like real brewed coffee. If flavor is a priority, a percolator wins.
Cowboy coffee — just boiling grounds directly in a pot of water — is the bare-minimum approach. It works, but you’ll get grounds in your cup no matter how carefully you pour. A percolator’s basket filter solves that problem elegantly.
The percolator’s biggest strength is its balance of simplicity, durability, and volume. It brews multiple cups at once, it’s nearly impossible to break, and it doesn’t need any accessories besides coffee and a heat source.
If you’re still weighing your options, our detailed breakdown of percolator vs. French press brewing might help you decide.
Common Mistakes That Ruin Camping Percolator Coffee
Even experienced campers make some of these errors. Knowing what to avoid will save you from dumping a bad batch and starting over.
Using too-fine grounds. We’ve covered this, but it bears repeating because it’s the number one complaint from new percolator users. “My coffee is full of sludge” almost always means the grind was too fine. Coarse, coarse, coarse.
Boiling the coffee. A percolator should perk, not boil. If your coffee tastes burnt or unbearably bitter, the heat was too high. Pull it back from the fire and let it do its thing at a gentler pace.
Perking too long. Fifteen, twenty minutes might seem like it’ll make “extra strong” coffee. It won’t. It’ll make “extra bitter” coffee. The difference between strong and bitter is extraction time, and going past 10 to 12 minutes crosses that line.
Not removing the basket. Leaving the grounds sitting in the hot water after brewing is basically the same as over-perking. Take the basket out as soon as the coffee is done.
Skipping the cleaning. Old coffee oils build up faster than you’d think. Even a quick rinse with hot water after each use makes a noticeable difference by the third or fourth morning of a trip.
Keeping Your Coffee Hot at Camp
You’ve brewed a perfect pot, but you’re not going to drink it all at once — especially if you’re savoring it around the fire. A percolator holds heat reasonably well on its own, but once you pull it off the heat source, it starts cooling.
One trick is to keep the percolator on the edge of the campfire grate, away from direct flame but close enough to stay warm. Just don’t leave it there too long, because the coffee will keep concentrating and eventually taste over-brewed.
A better option for longer trips is to pour your brewed coffee into a quality thermos. If you’re in the market for one, check out our roundup of the best thermoses for coffee, which includes options that keep coffee hot for 12+ hours — long enough for a full day of hiking.
FAQ
What size camping percolator should I buy?
For solo campers or couples, a 3 to 5-cup percolator is plenty. For groups of 4 to 6 people, look at 8 to 9-cup models. Groups larger than six will appreciate a 12-cup percolator. Remember that percolator “cups” are about 5 to 6 ounces each, so multiply accordingly for real-world mug sizes.
Can I use a camping percolator on a propane stove?
Yes. Most camping percolators work perfectly on propane and butane camp stoves. Just make sure the percolator’s base is stable on your stove’s burner grate. Some very small backpacking stoves have narrow supports that may not hold a wide-bottom percolator securely.
How do I keep coffee grounds out of my percolator coffee?
Use a coarse grind — that’s the single biggest factor. Make sure the basket lid is seated properly so grounds can’t escape from the top. Some campers also place a small piece of clean cheesecloth or a reusable metal filter inside the basket for extra filtration, though this isn’t usually necessary with the right grind size.
Is percolator coffee stronger than drip coffee?
Generally, yes. Because water cycles through the grounds multiple times in a percolator, the resulting coffee tends to be bolder and more full-bodied than single-pass drip coffee. You can control the strength by adjusting the amount of coffee you use and how long you let it perk.
Can I use a camping percolator over an open campfire?
Absolutely — that’s one of the main reasons people choose percolators for camping. Just make sure your percolator is all-metal with no plastic components that could melt. Position it on a campfire grate or a flat rock near the coals. Avoid placing it directly in roaring flames, which will overheat the water and scorch the coffee.
Your Next Morning at Camp
A camping percolator is one of those pieces of gear that earns its place in your kit every single trip. It’s simple enough that nothing can really go wrong, tough enough to survive years of campfire abuse, and capable of producing coffee that genuinely tastes good — not just “good for camping.”
Pick a size that matches your crew, get your hands on some coarsely ground beans, and give yourself those extra ten minutes in the morning to let the percolator do its work. That slow, rhythmic perk is half the experience.
Your next step? Grab the percolator that fits your camping style, practice with it once at home before your trip, and you’ll show up to the trailhead confident that your morning coffee is handled. The wilderness has a lot to offer — and it’s even better with a strong cup of coffee in your hand.