A single latte from your local café runs about $5 to $7 these days. Make one every morning, and you’re looking at roughly $1,800 a year — just on coffee. Here’s the thing: you can make a coffee latte with a frother at home that tastes just as good, and it takes about five minutes once you get the hang of it.
You don’t need a $1,000 espresso machine. You don’t need barista training. All you really need is strong coffee, milk, and a frother. That’s it. Whether you’ve got a handheld battery-powered frother or a fancy electric one that heats milk for you, this guide walks you through every step — from choosing the right coffee to pouring that silky, café-style drink.
What Exactly Is a Latte?
Before you start frothing anything, it helps to know what you’re actually making. A latte — short for “caffè latte,” which is Italian for “milk coffee” — is one of the most popular espresso-based drinks in the world. The Specialty Coffee Association describes it as a drink made with one or two shots of espresso topped with steamed milk and a thin layer of milk foam on top.
The standard ratio is roughly 1 part espresso to 3 parts steamed milk, with just a small cap of foam. That’s what separates a latte from a cappuccino, which has much more foam and less steamed milk. It’s also different from a flat white, which uses microfoam and a higher coffee-to-milk ratio.
So the goal here is pretty straightforward: make strong coffee, froth your milk until it’s smooth and creamy (not stiff and bubbly), and combine them. Simple enough, right?
Quick Fact: The caffè latte as we know it became popular in American coffee culture during the 1980s, though Italians had been drinking milk and coffee together for centuries.
What You’ll Need to Get Started
You don’t need a mountain of gear for this. But using the right stuff does make a difference, so let’s talk about what actually matters.
The Coffee
A true latte uses espresso, but you don’t need an espresso machine to get close. What you really need is strong, concentrated coffee. A few brewing methods work well for this.
A Moka pot is one of the best alternatives because it produces a thick, espresso-like brew on your stovetop. If you’ve been curious about how it stacks up against other methods, check out this comparison of French press vs. espresso to see why concentrated brewing makes such a difference for latte-style drinks.
An AeroPress can also produce a concentrated shot by using a smaller amount of water with a fine grind. Even a strong French press brew can work in a pinch, though it won’t be quite as concentrated.
Whatever method you choose, use a dark or medium-dark roast. These hold up better against the milk and keep that rich coffee flavor from disappearing. Light roasts tend to taste washed out once you add frothed milk. If you’re still searching for the right beans, our guide to the best coffee beans for espresso machines covers roasts that work well for any concentrated brew — not just espresso machines.
The Milk
Whole milk froths the best. Full stop. The fat content (around 3.25%) gives you that thick, velvety texture you get at coffee shops. It creates microfoam naturally and holds its structure in the cup.
That said, you can use other milks:
- 2% milk froths decently, just a bit thinner
- Oat milk (especially barista-edition brands like Oatly Barista or Califia Barista Blend) froths surprisingly well
- Almond milk tends to be thin and separates quickly — not ideal
- Soy milk froths well but can curdle if your coffee is very acidic
One often-overlooked detail: cold milk froths better than warm milk. Start with milk straight from the fridge. This gives you more time to work the frother before the milk heats up (if using a steam-based method) and produces finer, more stable bubbles.
The Frother
There are three main types of milk frothers, and each one gives slightly different results.
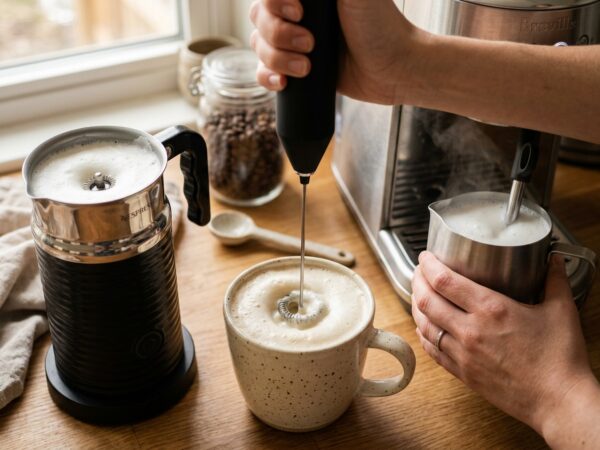
Handheld (battery-powered) frothers are the most affordable, usually between $10 and $20. They’re small, shaped like a tiny whisk on a stick, and run on AA batteries or a rechargeable battery. Brands like Zulay, PowerLix, and Elementi are popular picks. They work, but they only froth — they don’t heat the milk, so you’ll need to warm the milk separately.
Electric jug frothers (like the Breville Milk Café, Nespresso Aeroccino, or Miroco) both heat and froth the milk automatically. You pour cold milk in, press a button, and get perfectly frothed, hot milk about two minutes later. These cost between $30 and $80 and are worth every penny if you’re making lattes regularly.
Manual pump frothers look like small French presses. You heat the milk yourself, pour it in, and pump the plunger up and down. They’re cheap and effective, though they take more effort. Some people love them because they give you total control.
If you’re shopping for one, our roundup of the best coffee frothers breaks down the top options across every price range.
How to Make a Coffee Latte with a Frother: Step by Step
Here’s the full process, broken down so each step is clear. Once you’ve done it two or three times, you’ll be able to make a latte on autopilot.
Step 1: Brew Your Concentrated Coffee
Start by brewing your espresso or espresso-style coffee. You want about 2 ounces (60 ml) of strong, concentrated coffee — that’s roughly equivalent to a double shot of espresso.
If you’re using a Moka pot, fill the bottom chamber with hot water up to the safety valve, add finely ground coffee to the filter basket without tamping, and heat it on medium. Once it starts gurgling, take it off the heat. You’ll get about 2–4 ounces of strong, rich coffee.
With an AeroPress, use an inverted method: 18 grams of finely ground coffee, 60–80 ml of water just off the boil (around 200°F / 93°C), steep for one minute, then press. You’ll get a concentrated shot that mimics espresso nicely.
Pro Tip: Brew your coffee first and let it sit while you froth the milk. The coffee can wait; the frothed milk can’t. Milk foam starts breaking down and separating within about 30 seconds to a minute, so you want to pour it as soon as it’s ready.
Step 2: Heat Your Milk (If Using a Handheld Frother)
Skip this step if you’re using an electric jug frother that heats milk for you.
For handheld frothers, you need to warm the milk yourself. Pour about 6 to 8 ounces (180–240 ml) of milk into a microwave-safe mug or a small saucepan.
Microwave method: Heat for 45 to 60 seconds, until the milk is warm but not boiling. You want it between 140°F and 155°F (60–68°C). If you don’t have a thermometer, touch the outside of the mug — it should feel hot but not unbearable to hold. If you can’t keep your hand on it, it’s too hot.
Stovetop method: Heat the milk in a small saucepan over medium-low heat, stirring gently. Remove it from the burner as soon as you see the first tiny wisps of steam. Don’t let it boil. Boiled milk tastes scalded and won’t froth properly because the proteins break down.
The target temperature matters here, and it’s a detail most articles gloss over. If you’ve ever had a latte that tasted burnt or weirdly flat, the milk was probably too hot. The sweet spot for milk protein is around 150°F (65°C) — that’s where you get the best foam structure and natural sweetness from the lactose. Go above 170°F (77°C), and the milk starts tasting bitter and the foam collapses.
If you’re interested in the science behind getting temperatures right for hot drinks, you might enjoy our breakdown of the best serving temperature for hot chocolate, which applies many of the same principles.
Step 3: Froth the Milk
This is where the magic happens — and where most people go wrong. The goal isn’t to create a mountain of stiff, bubbly foam like you’d see on a kids’ hot chocolate. You want microfoam: smooth, silky, with tiny bubbles so small you can barely see them. Think wet paint texture, not bubble bath.
With a handheld frother:
Hold the frother at a slight angle and submerge the whisk just below the surface of the milk — not at the bottom of the cup, and not sticking out of the milk. Turn it on and keep it near the surface for the first 5 to 10 seconds to introduce air. Then slowly lower it deeper into the milk and continue frothing for another 15 to 20 seconds.
The total frothing time should be about 20 to 30 seconds. You’ll see the milk increase in volume by about one-third. If it doubles in volume, you’ve over-frothed — that’s cappuccino territory.
With an electric jug frother:
Pour cold milk into the jug up to the latte line (most units have separate lines for latte and cappuccino — the latte line is higher because you want less foam). Press the button for “latte” or “warm froth.” Walk away for two minutes. Done.
With a manual pump frother:
Pour your heated milk in (fill it only about one-third full, since the milk will expand). Pump the plunger vigorously up and down for about 15 to 20 seconds. You’ll feel the resistance change as the milk expands. Stop when it feels like the plunger is moving through thick cream.
⚠️ Warning: If you’re using a handheld frother in a mug, use a mug that’s tall and narrow. A wide, shallow mug leads to splashing, and hot milk splatter is no fun. Trust me on this.
Step 4: Tap and Swirl
Right after frothing, tap the milk container firmly on the counter two or three times. Then gently swirl the milk in a circular motion for a few seconds.
Why? The tapping pops any large bubbles that formed on the surface. The swirling reintegrates the foam with the steamed milk below, giving you that uniform, glossy texture. This step takes about five seconds and makes a noticeable difference in the final drink. Professional baristas do this every single time — it’s not optional if you want smooth results.
After swirling, the milk should look like melted vanilla ice cream — glossy, slightly thick, and pourable. If it looks like meringue on top with thin liquid underneath, you’ve over-frothed or didn’t swirl enough.
Step 5: Pour and Combine
Pour your espresso (or concentrated coffee) into a 12- to 16-ounce mug first. If you like sweetened lattes, add your sugar or syrup to the hot coffee now and stir. It dissolves much better in hot coffee than in frothed milk.
Now, pour the frothed milk into the coffee. Start by pouring slowly from a few inches above the cup, letting the steamed milk flow under the foam. As the cup fills up, bring the container closer to the surface and pour a little faster to let some foam come through on top.
You should end up with a drink that’s mostly steamed milk mixed with coffee, topped with about half an inch of foam. That thin foam cap is the signature of a latte — enough to look and feel luxurious, but not so much that it’s a cappuccino.
Pro Tip: Want to try basic latte art? When the cup is about two-thirds full, bring the pouring container very close to the surface and gently wiggle it side to side as you pour. Even with a simple frother, you can get a basic heart or leaf shape with practice. It won’t look like something from a barista competition, but it’s surprisingly satisfying.
Flavor Variations Worth Trying
A plain latte is great, but the beauty of making them at home is that you can customize them however you like — without paying $1.50 per pump of syrup.
Vanilla Latte
Add half a teaspoon of pure vanilla extract to your coffee, or stir in one tablespoon of vanilla syrup. If you’re using syrup, add it to the espresso before the milk so it mixes evenly.
Caramel Latte
Drizzle caramel sauce into the bottom of the mug before adding coffee. About one tablespoon works well. Then add your espresso, stir, and pour frothed milk on top. Finish with another drizzle of caramel over the foam.
Pumpkin Spice Latte
Mix one tablespoon of pumpkin purée (actual canned pumpkin, not pie filling) with your espresso, along with a pinch each of cinnamon, nutmeg, and ginger. Stir well, then add your frothed milk. If you’re into seasonal coffee drinks, you might also enjoy learning how to make pumpkin cream cold brew for a chilled version.
Mocha Latte
Stir one tablespoon of cocoa powder or chocolate syrup into your hot espresso until it’s fully dissolved. Pour frothed milk over the top. Finish with a dusting of cocoa powder on the foam.
Iced Latte
Brew your concentrated coffee and let it cool for a minute. Fill a tall glass with ice. Pour the coffee over the ice. Then froth cold milk (yes, cold — handheld frothers work fine with cold milk) and pour it over the coffee. No need to heat anything. The ratios stay the same.
Troubleshooting Common Problems
Even with the right technique, things can go sideways. Here’s how to fix the most common latte-making frustrations.
Your Foam Is Too Bubbly and Stiff
This means you frothed too long or kept the frother too close to the surface the whole time. Large bubbles form when too much air gets incorporated without enough mixing. Fix it by spending less time at the surface (just the first few seconds) and then lowering the frother deeper. Also, try the tap-and-swirl step — it rescues a lot of imperfect froths.
The Coffee Tastes Weak
Your brew isn’t concentrated enough. A latte uses a lot of milk, so a regular-strength cup of drip coffee will taste like flavored milk. You need espresso-strength coffee. If you’re using a drip or pour-over, try halving the water amount. Or better yet, switch to a Moka pot or AeroPress for a more concentrated result. Choosing the right brewing method makes a big difference — our comparison of French press vs. Moka pot explains why Moka pots produce stronger coffee that stands up to milk.
The Milk Won’t Froth
Three common causes: the milk is too hot (above 170°F), the milk is too old (older milk has degraded proteins and won’t hold foam), or you’re using a milk that doesn’t froth well. Skim milk actually froths easily because of its high protein content, but it produces dry, airy foam. Whole milk froths into that creamy texture you want. If you’re using plant milk, make sure it’s a barista-blend formula — regular almond or coconut milk often won’t cooperate.
The Drink Separates
If your frothed milk sits on top of the coffee without mixing in, you likely have stiff foam sitting on liquid milk. Proper frothing creates a uniform mixture of steamed milk and microfoam. Swirling the milk after frothing (Step 4) helps prevent this. Also, pour from a lower height to let the milk flow through the coffee rather than floating on top.
How Your Coffee Beans Affect the Final Latte
People don’t talk about this enough: the beans you use matter as much as the frothing technique. A latte might be milk-heavy, but the espresso is the backbone. Get that wrong, and no amount of perfect foam will save it.
For lattes, you generally want beans with chocolatey, nutty, or caramel-like flavor notes. These complement the sweetness of steamed milk beautifully. Beans with fruity or floral notes — typical of many single-origin light roasts from Ethiopia or Kenya — can taste strange or sour when combined with milk.
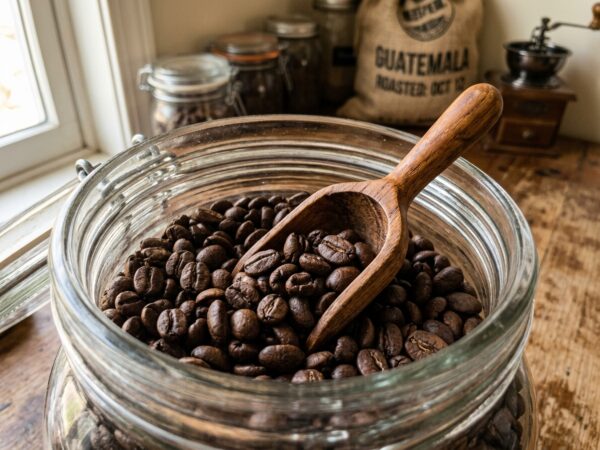
Freshness also plays a role. Coffee beans start losing their aromatic compounds within about two to three weeks of roasting. If your beans have been sitting in the pantry for months, your latte will taste flat no matter what you do. Proper coffee bean storage — airtight, cool, and away from light — keeps your beans fresh longer and gives you noticeably better-tasting lattes.
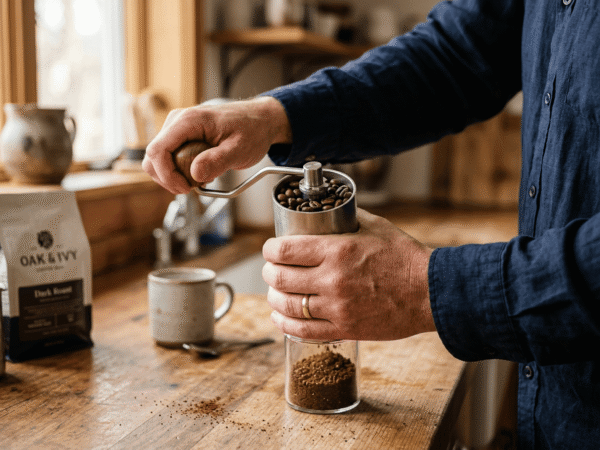
Grinding fresh is another big improvement. Pre-ground coffee works, but freshly ground beans right before brewing release more oils and aromatics. Even an affordable hand coffee grinder can make a real difference in flavor.
Tips That Actually Make a Difference
After years of making lattes at home and way too many trial-and-error cups, here are the details that separate an okay home latte from one that genuinely rivals your favorite café.
Preheat your mug. Fill it with hot water from the tap for 30 seconds while you brew, then dump the water out before pouring your espresso. Cold ceramic saps heat from the drink fast. This simple step keeps your latte warmer, longer.
Weigh your coffee. A kitchen scale costs about $10 and removes all guesswork. For a Moka pot, use about 15–18 grams of coffee. For an AeroPress espresso-style shot, 15–18 grams as well. Eyeballing scoops leads to inconsistency.
Use filtered water. Coffee is over 98% water. If your tap water tastes off — chlorinated, metallic, or mineral-heavy — your coffee will taste off too. Filtered water makes a quietly dramatic improvement.
Experiment with milk temperature. Some people prefer lattes slightly cooler than the standard 150°F — around 130–140°F (54–60°C). This is called a “warm latte” at some shops, and it lets you taste more of the milk’s natural sweetness because your taste buds work better at lower temperatures.
Clean your frother after every use. Milk residue builds up fast and becomes almost impossible to scrub off once dried. Rinse your handheld frother under warm water and run it for a few seconds right after use. For jug frothers, wash the lid and whisk attachment immediately.
FAQ
Can I make a latte without an espresso machine?
Absolutely. You don’t need an espresso machine at all. A Moka pot, AeroPress, or even a very strong French press brew will work. The key is to brew a small amount of concentrated coffee — about 2 ounces — that can hold its flavor against 6 to 8 ounces of milk. Many home baristas prefer Moka pots specifically because they’re affordable (usually under $30) and produce espresso-like results on a regular stovetop.
What’s the difference between a latte and a cappuccino?
Both use espresso and frothed milk, but the ratios differ. A latte is mostly steamed milk with just a thin layer of foam — the result is smooth, creamy, and mildly coffee-flavored. A cappuccino has equal parts espresso, steamed milk, and thick foam, so it’s stronger in coffee flavor and has that signature airy foam texture. If you froth your milk until it roughly doubles in volume, you’re making a cappuccino. For a latte, you want the milk to increase by only about one-third.
What type of frother works best for lattes?
An electric jug frother (like the Nespresso Aeroccino 4 or Breville Milk Café) gives the most consistent results because it heats and froths simultaneously, producing reliable microfoam every time. Handheld frothers work well too and are much cheaper — they just require more technique and a separate step for heating the milk. Manual pump frothers fall somewhere in between. If you’re just starting out and don’t want to invest much, a handheld frother under $15 is a perfectly fine place to begin.
Can I froth non-dairy milk for a latte?
Yes, but not all non-dairy milks froth equally. Barista-edition oat milk (from brands like Oatly, Minor Figures, or Califia) froths the closest to whole dairy milk and is widely considered the best plant-based option for lattes. Soy milk froths well but can curdle with very hot or acidic coffee. Almond milk tends to produce thin, unstable foam unless you use a barista blend. Coconut milk froths reasonably but adds a noticeable coconut flavor.
How much caffeine is in a homemade latte?
That depends entirely on your coffee. A double shot of espresso contains roughly 120–140 mg of caffeine. A Moka pot produces something similar — about 100–130 mg from a standard 3-cup Moka pot brew. An AeroPress shot falls in a similar range. For context, the FDA suggests that up to 400 mg of caffeine per day is generally safe for most healthy adults, so a single homemade latte is well within that limit.
Your Next Cup Starts Now
Making a coffee latte with a frother at home is one of those skills that feels tricky the first time and becomes second nature by the third. You’ll start noticing what temperature your milk froths best at, how long your particular frother needs to run, and which coffee roast makes your perfect cup.
The best part? You’re not locked into one recipe. Once you’ve got the basic technique down, you can tweak everything — the milk, the coffee strength, the flavors — until your home latte is exactly what you want. And you’ll be saving a small fortune while you’re at it.
So grab your frother, heat some milk, and make yourself a latte. You’ve got everything you need.