A Starbucks Grande Pumpkin Cream Cold Brew costs around $5.95 — and during peak fall season, the drive-through line can stretch longer than your morning commute. Here’s the good news: you can make this exact drink at home for a fraction of the price, with ingredients you probably already have in your kitchen.
The Pumpkin Cream Cold Brew became Starbucks’ best-selling fall drink within a year of its 2019 launch, and it’s easy to see why. You get smooth, slightly sweet cold brew topped with a velvety layer of pumpkin-spiced cream that slowly cascades down through the coffee. It’s a beautiful drink, and it tastes even better than it looks.
But you don’t need a barista badge to pull this off. The recipe is surprisingly straightforward — two main components, a handful of pantry staples, and about 10 minutes of active work. Let’s get into it.
What Makes Pumpkin Cream Cold Brew Different from a Pumpkin Spice Latte?
People often confuse these two drinks, so let’s clear that up quickly. A Pumpkin Spice Latte (the famous PSL) is a hot espresso-based drink where pumpkin spice syrup gets mixed directly into the espresso and steamed milk. Everything blends together.
A Pumpkin Cream Cold Brew works differently. The cold brew itself stays lightly sweetened with vanilla — no pumpkin flavor in the coffee at all. The pumpkin magic happens entirely in the cold foam that sits on top. As you sip, the creamy pumpkin layer mixes gradually with the cold brew, creating that signature layered experience.
This is actually why so many coffee lovers prefer it over the PSL. You’re tasting real coffee, not just a sugar bomb with coffee somewhere in the background. The cold brew’s natural chocolate and caramel notes play beautifully against the warm spice of the pumpkin cream.
If you’re someone who appreciates the actual taste of coffee but still wants that fall flavor, this drink was literally designed for you. And choosing the right coffee base matters — which brings us to the most important part.
The Cold Brew Base: Your Foundation
Your pumpkin cream cold brew is only as good as the cold brew underneath it. You’ve got two options here: make your own or buy pre-made cold brew concentrate.
Making cold brew at home is dead simple, though it does require some patience. You’ll need coarsely ground coffee and cold or room-temperature water. The ratio that works best for this particular drink is 1 cup of ground coffee to 4 cups of water. You can use a dedicated cold brew coffee maker or just a mason jar — the container doesn’t matter much.
Combine the grounds and water, stir gently, cover it, and stick it in your fridge for 12 to 18 hours. Once it’s steeped, strain it through a fine-mesh sieve lined with cheesecloth or a paper filter. What you’ll get is a concentrate — smooth, rich, and low in acidity. Dilute it 1:1 with water when you’re ready to build your drink.
Pro Tip: Cold brew works best with a medium or medium-dark roast. Light roasts can taste thin and overly acidic when cold-brewed. Look for beans with tasting notes of chocolate, caramel, or nuts — they complement the pumpkin cream beautifully. If you’re not sure where to start with beans, check out this guide on choosing the best coffee beans for different brew methods.
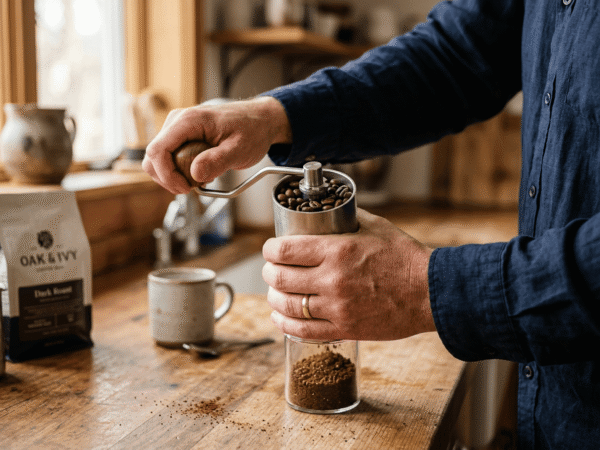
The grind size matters here too. You want a coarse grind, similar to raw sugar. Too fine and your cold brew turns bitter and muddy. If you’re grinding your own beans, whether with an electric or hand coffee grinder, set it to the coarsest setting. And if you don’t own a grinder at all, there are actually several ways to grind beans without one.
Don’t want to wait 12 hours? That’s completely fair. Store-bought cold brew concentrate from brands like Chameleon, Stumptown, or even Trader Joe’s works great. No judgment. The pumpkin cream is really the star of this recipe anyway.
The Pumpkin Cream: Where the Magic Lives
This is the part that makes people’s eyes light up. The pumpkin cream cold foam is what separates this drink from regular iced coffee, and getting it right is the difference between “pretty good” and “wait, this is better than Starbucks.”
Here’s what you’ll need for the pumpkin cream (makes enough for 2 drinks):
- Heavy cream — ½ cup (you can also use half-and-half for a lighter version)
- Pumpkin puree — 2 tablespoons (canned is perfect; just make sure it’s pure pumpkin, not pumpkin pie filling)
- Vanilla syrup — 1 tablespoon (or 2 teaspoons vanilla extract plus 1 tablespoon simple syrup)
- Pumpkin spice — ½ teaspoon
- Maple syrup or sugar — 1 tablespoon (adjust to your sweet tooth)
Here’s the thing about pumpkin spice — you can buy pre-mixed pumpkin pie spice from brands like McCormick, or you can make your own blend. A quick homemade version: mix 3 parts cinnamon, 1 part ginger, 1 part nutmeg, and a pinch each of allspice and cloves. That’s it. Fresh-ground spices give you a noticeably better aroma, but the pre-mixed stuff from the store is perfectly fine.
Did you know? Despite the name, traditional “pumpkin spice” doesn’t contain any actual pumpkin. It’s the spice blend historically used in pumpkin pie. That’s why we’re adding real pumpkin puree separately — it gives the cream body and that authentic earthy sweetness.
Now, the technique. Combine all the cream ingredients in a bowl or jar. You want to froth this mixture until it’s thick and airy, but still pourable. Think of it like a slightly loosened whipped cream — it should hold its shape for a moment when you drizzle it, then slowly start to sink and swirl.
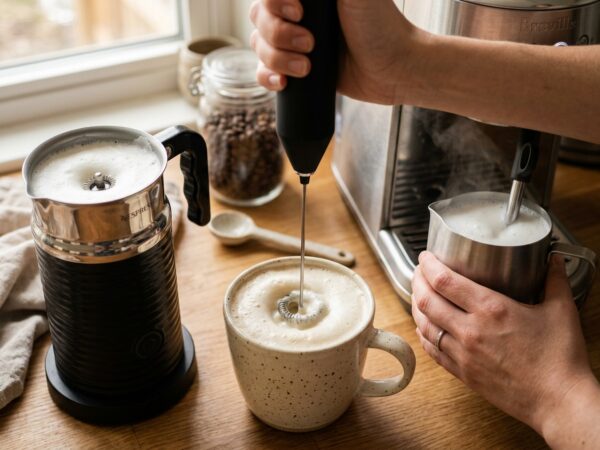
You’ve got a few ways to froth it. A milk frother is the easiest option and gives you the most consistent results in about 30 seconds. A small whisk works too, but it takes more elbow grease. A blender or immersion blender can do the job, but be careful — it’s easy to over-whip the cream. You want cold foam, not butter.
⚠️ Warning: Don’t use a French press to froth this cream. The pumpkin puree can clog the mesh filter, and cleaning it out is a nightmare. Stick with a frother or whisk.
One more important detail: keep everything cold. Cold cream froths better and holds its structure longer. If your cream is room temperature, it’ll deflate quickly and you’ll lose that beautiful layered look.
Putting It All Together: The Assembly
You’ve got your cold brew. You’ve got your pumpkin cream. Now let’s build this drink properly, because the order actually matters.
Step 1: Fill a tall glass (16 oz works great) with ice. Fill it generously — you want the glass packed about three-quarters full. Large ice cubes or spheres are ideal because they melt slower and won’t water down your drink as quickly.
Step 2: Add vanilla syrup to the glass — about 1 to 2 tablespoons depending on how sweet you like things. Starbucks uses their own vanilla syrup, but any vanilla syrup works. Torani and Monin are popular options. Or make your own by dissolving equal parts sugar and water over heat, then adding a splash of vanilla extract.
Step 3: Pour your cold brew over the ice, leaving about 1.5 to 2 inches of space at the top. If you’re using concentrate, dilute it with equal parts water first. The coffee should come about three-quarters up the glass.
Step 4: Give the pumpkin cream one final quick froth or stir. Then slowly pour it over the back of a spoon onto the top of the cold brew. This creates that gorgeous layered effect where the cream sits on top like a cloud. Pour gently — if you dump it in, it’ll just mix right into the coffee and you’ll lose the visual appeal.
Step 5: Finish with a light dusting of pumpkin spice on top. This is mostly for presentation and aroma, but don’t skip it. That first sip where you smell the warm spice before the cold coffee hits your tongue? That’s the whole experience right there.
And that’s it. Start to finish, the active assembly takes maybe 5 minutes (assuming your cold brew is already made). The first time I made this at home, I was genuinely shocked at how close it tasted to the Starbucks version. Better, actually, because I could control the sweetness.
Customizations That Actually Work
One of the best parts about making this at home is dialing it in to your exact preferences. Here are some variations worth trying.
Go dairy-free. Swap the heavy cream for full-fat coconut cream. It froths surprisingly well and adds a subtle coconut undertone that pairs nicely with pumpkin spice. Oat milk can work too, but it doesn’t froth as thick — you’ll get a lighter, thinner foam layer.
Make it a little boozy. Add a half-ounce of Baileys, RumChata, or Kahlúa to the cold brew before topping with the pumpkin cream. This turns it into a fantastic fall cocktail for weekend brunches or evening get-togethers.
Adjust the sweetness. Starbucks’ version is sweet — really sweet. At home, you can cut the vanilla syrup in half or use a sugar-free alternative. Monk fruit sweetener and sugar-free vanilla syrup from brands like Jordan’s Skinny Syrups work well if you’re watching your sugar intake. You can also swap maple syrup in the cream for honey, though honey adds a floral note that changes the flavor profile a bit.
Try different coffee bases. While cold brew is the classic choice here, a strong iced coffee or even chilled drip coffee can stand in if you’re in a pinch. The drink won’t be quite as smooth — drip coffee has more acidity than cold brew — but it still tastes great with the pumpkin cream on top.
Add espresso for a stronger kick. Pour a shot of espresso over ice, top up with cold water, then add the pumpkin cream. This gives you an iced pumpkin cream americano vibe — bolder and more intense than the cold brew version.
How to Batch-Prep for the Whole Week
Here’s where the homemade approach really pays off. Instead of spending $6 every day at Starbucks, you can prep everything on Sunday and have pumpkin cream cold brews ready to go all week.
Your cold brew concentrate keeps beautifully in the fridge for up to two weeks — just store it in an airtight container or jar. Make a big batch on the weekend and you’re covered.
The pumpkin cream is a different story. Because it contains dairy and pumpkin puree, it’ll stay fresh for about 4 to 5 days refrigerated. Make a larger batch of the cream mixture (without frothing it) and store it in a jar with a tight lid. Each morning, just pour out what you need and give it a quick froth. Takes about 30 seconds.
You can also pre-mix the vanilla syrup into individual portions of cold brew and store those separately. Then your morning routine becomes: grab cold brew from fridge, pour over ice, froth cream for 30 seconds, pour on top, done. You’re out the door in under two minutes with a drink that would’ve cost you almost $6 and a 15-minute wait.
Quick Math: A homemade pumpkin cream cold brew costs roughly $0.75 to $1.25 per serving, depending on your beans and cream quality. Over a month of daily drinks, that’s about $25 to $37 compared to roughly $180 at Starbucks. You’re saving over $140 a month. That adds up to almost $700 during a typical fall season (September through January). Let that sink in.
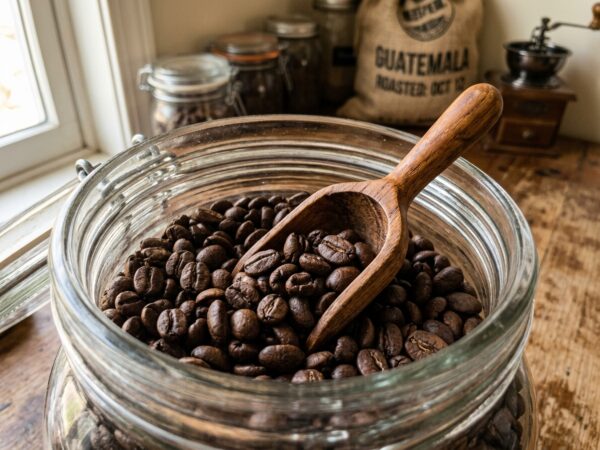
For proper coffee bean storage to keep your beans fresh throughout the week, make sure you’re using an airtight, opaque container away from heat and light. Fresh beans make a noticeable difference in cold brew quality.
Troubleshooting Common Problems
Even simple recipes can go sideways sometimes. Here are the issues people run into most and how to fix them.
The cream sinks immediately instead of floating. Your cream is either too thin or too warm. Make sure you’re using heavy cream (not milk or light cream) and that everything is well chilled. Also, froth it a bit more — you need enough air incorporated so the cream is lighter than the coffee underneath.
The cold brew tastes bitter or harsh. You probably steeped it too long or used too fine a grind. Cold brew should steep 12 to 18 hours max. Beyond 20 hours, it starts pulling out unpleasant bitter compounds. And remember, the grind should be coarse — if it looks like table salt, it’s too fine.
The drink tastes too sweet or not sweet enough. This is entirely personal. Start with less syrup than you think you need. You can always add more, but you can’t take it out. If the pumpkin cream itself is too sweet, reduce the maple syrup or sugar in the cream recipe by half.
The pumpkin cream is grainy. This happens when the pumpkin puree doesn’t fully blend with the cream. Give it an extra 15 to 20 seconds of frothing, or push the mixture through a fine strainer before frothing to remove any fibrous bits from the pumpkin.
The drink gets watery too fast. Use larger ice cubes. Those small ice cubes from standard ice trays melt quickly and dilute your drink within minutes. Silicone ice cube molds that make 2-inch cubes are a worthy $8 investment. Some people even freeze coffee into ice cubes so that as they melt, they’re adding more coffee flavor instead of water.
Why This Drink Works So Well (A Little Coffee Science)
There’s a reason the pumpkin cream cold brew hits differently than other seasonal coffee drinks, and it’s not just marketing.
Cold brew coffee is naturally smoother and about 67% less acidic than hot-brewed coffee, according to research published in Scientific Reports in 2018. That lower acidity means the coffee’s chocolate and caramel flavor notes come through more clearly without being masked by sharpness. These are exactly the flavor profiles that complement warm spices like cinnamon, ginger, and nutmeg.
The cold temperature also plays a role. Cold beverages suppress our perception of sweetness slightly, which is why the drink doesn’t taste overwhelmingly sugary even though there’s syrup in both the coffee and the cream. If you heated this same recipe and served it warm, it would taste noticeably sweeter.
And that floating cream layer isn’t just for looks. By keeping the cream separate from the coffee, you experience both flavors independently with each sip — the cool, slightly bitter coffee comes through first, followed by a wave of sweet, spiced cream. Your brain registers this as more complex and satisfying than if everything were mixed together. It’s the same principle behind layered cocktails and why a well-poured Guinness tastes better than a hastily-poured one.
FAQ
Can I use regular milk instead of heavy cream for the pumpkin cold foam?
You can, but the results won’t be the same. Whole milk will give you a lighter, thinner foam that doesn’t hold its shape as long. Skim milk and 2% create foam that’s airy but dissolves into the coffee within a minute or two. For the best experience, stick with heavy cream or at minimum half-and-half. If you’re going dairy-free, full-fat coconut cream is your best bet — it has enough fat content to froth properly and float on top of the cold brew.
How long does homemade pumpkin cream cold brew last in the fridge?
The cold brew concentrate itself stays fresh for up to 14 days in the fridge when stored in a sealed container. The pumpkin cream mixture (unwhipped) lasts about 4 to 5 days. Don’t pre-froth the cream and store it — the foam will collapse. Always froth fresh right before serving. If you’ve already assembled a full drink, try to consume it within a few hours. The ice will melt, the cream will fully mix in, and the whole thing loses its magic.
Is pumpkin cream cold brew healthier than a Pumpkin Spice Latte?
Generally, yes. A Starbucks Grande Pumpkin Cream Cold Brew has about 250 calories and 31 grams of sugar. A Grande Pumpkin Spice Latte with whipped cream clocks in at around 390 calories and 50 grams of sugar. Making it at home, you can cut those numbers significantly by reducing the syrup, using less sugar in the cream, or swapping to a lighter cream. Some home versions come in under 150 calories with careful ingredient choices.
What’s the best coffee roast for pumpkin cream cold brew?
Medium to medium-dark roasts work best. They bring out the chocolate, caramel, and nutty flavor notes that complement the pumpkin spice beautifully. Dark roasts can work but may add a smoky or overly robust flavor that competes with the cream. Light roasts tend to taste too bright and acidic for this drink. If you want recommendations on picking quality beans, this guide to the best coffee beans breaks it down by brew method and flavor preference.
Can I make pumpkin cream cold brew without a frother?
Absolutely. A small whisk and some arm energy will get you there — it just takes about 2 to 3 minutes of vigorous whisking. You can also shake the cream mixture in a sealed mason jar for about 60 seconds. Another trick: put the cream mixture in a French press and pump the plunger up and down rapidly (though skip this method if your cream has pumpkin puree chunks, as it can clog the filter). A handheld frother is worth the $10 to $15 investment if you plan to make this drink regularly.
Your Next Morning Just Got Better
Making pumpkin cream cold brew at home is one of those small kitchen wins that genuinely improves your daily routine. You save money, you control exactly what goes in your cup, and honestly? You’ll probably make a better version than what you’d get in a drive-through.
Start with good cold brew, nail the pumpkin cream ratio, and keep everything cold. That’s really the whole secret. Once you’ve made it two or three times, you’ll have the process down to a 5-minute morning ritual.
So grab some pumpkin puree, pick up quality beans, and give this a shot this weekend. Your fall self will thank you — and your wallet definitely will too.